

VOTE
the big flip!
Vote for your favourite from THE BIG FLIP projects for 2026 below!
1. Neil MacDonald
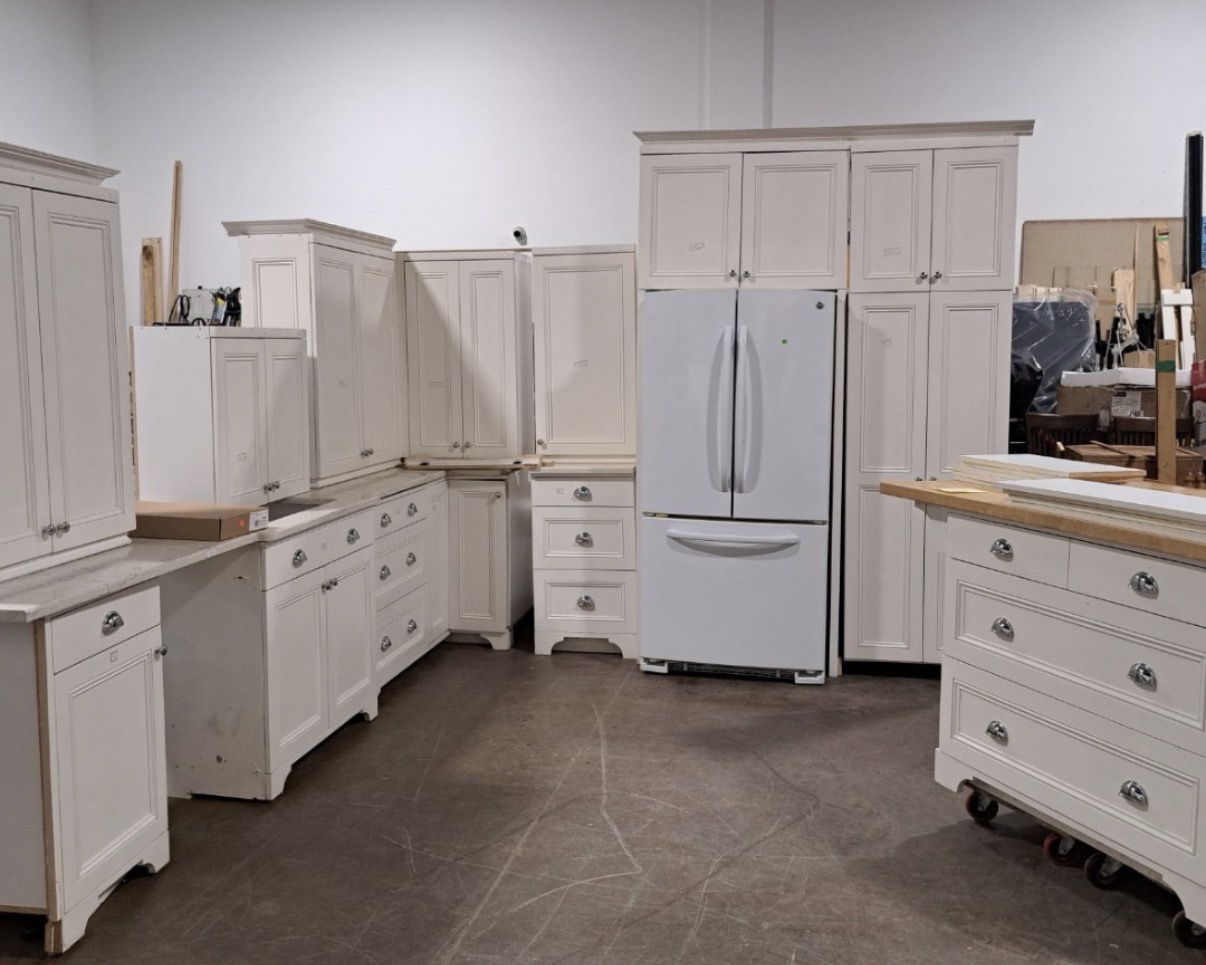
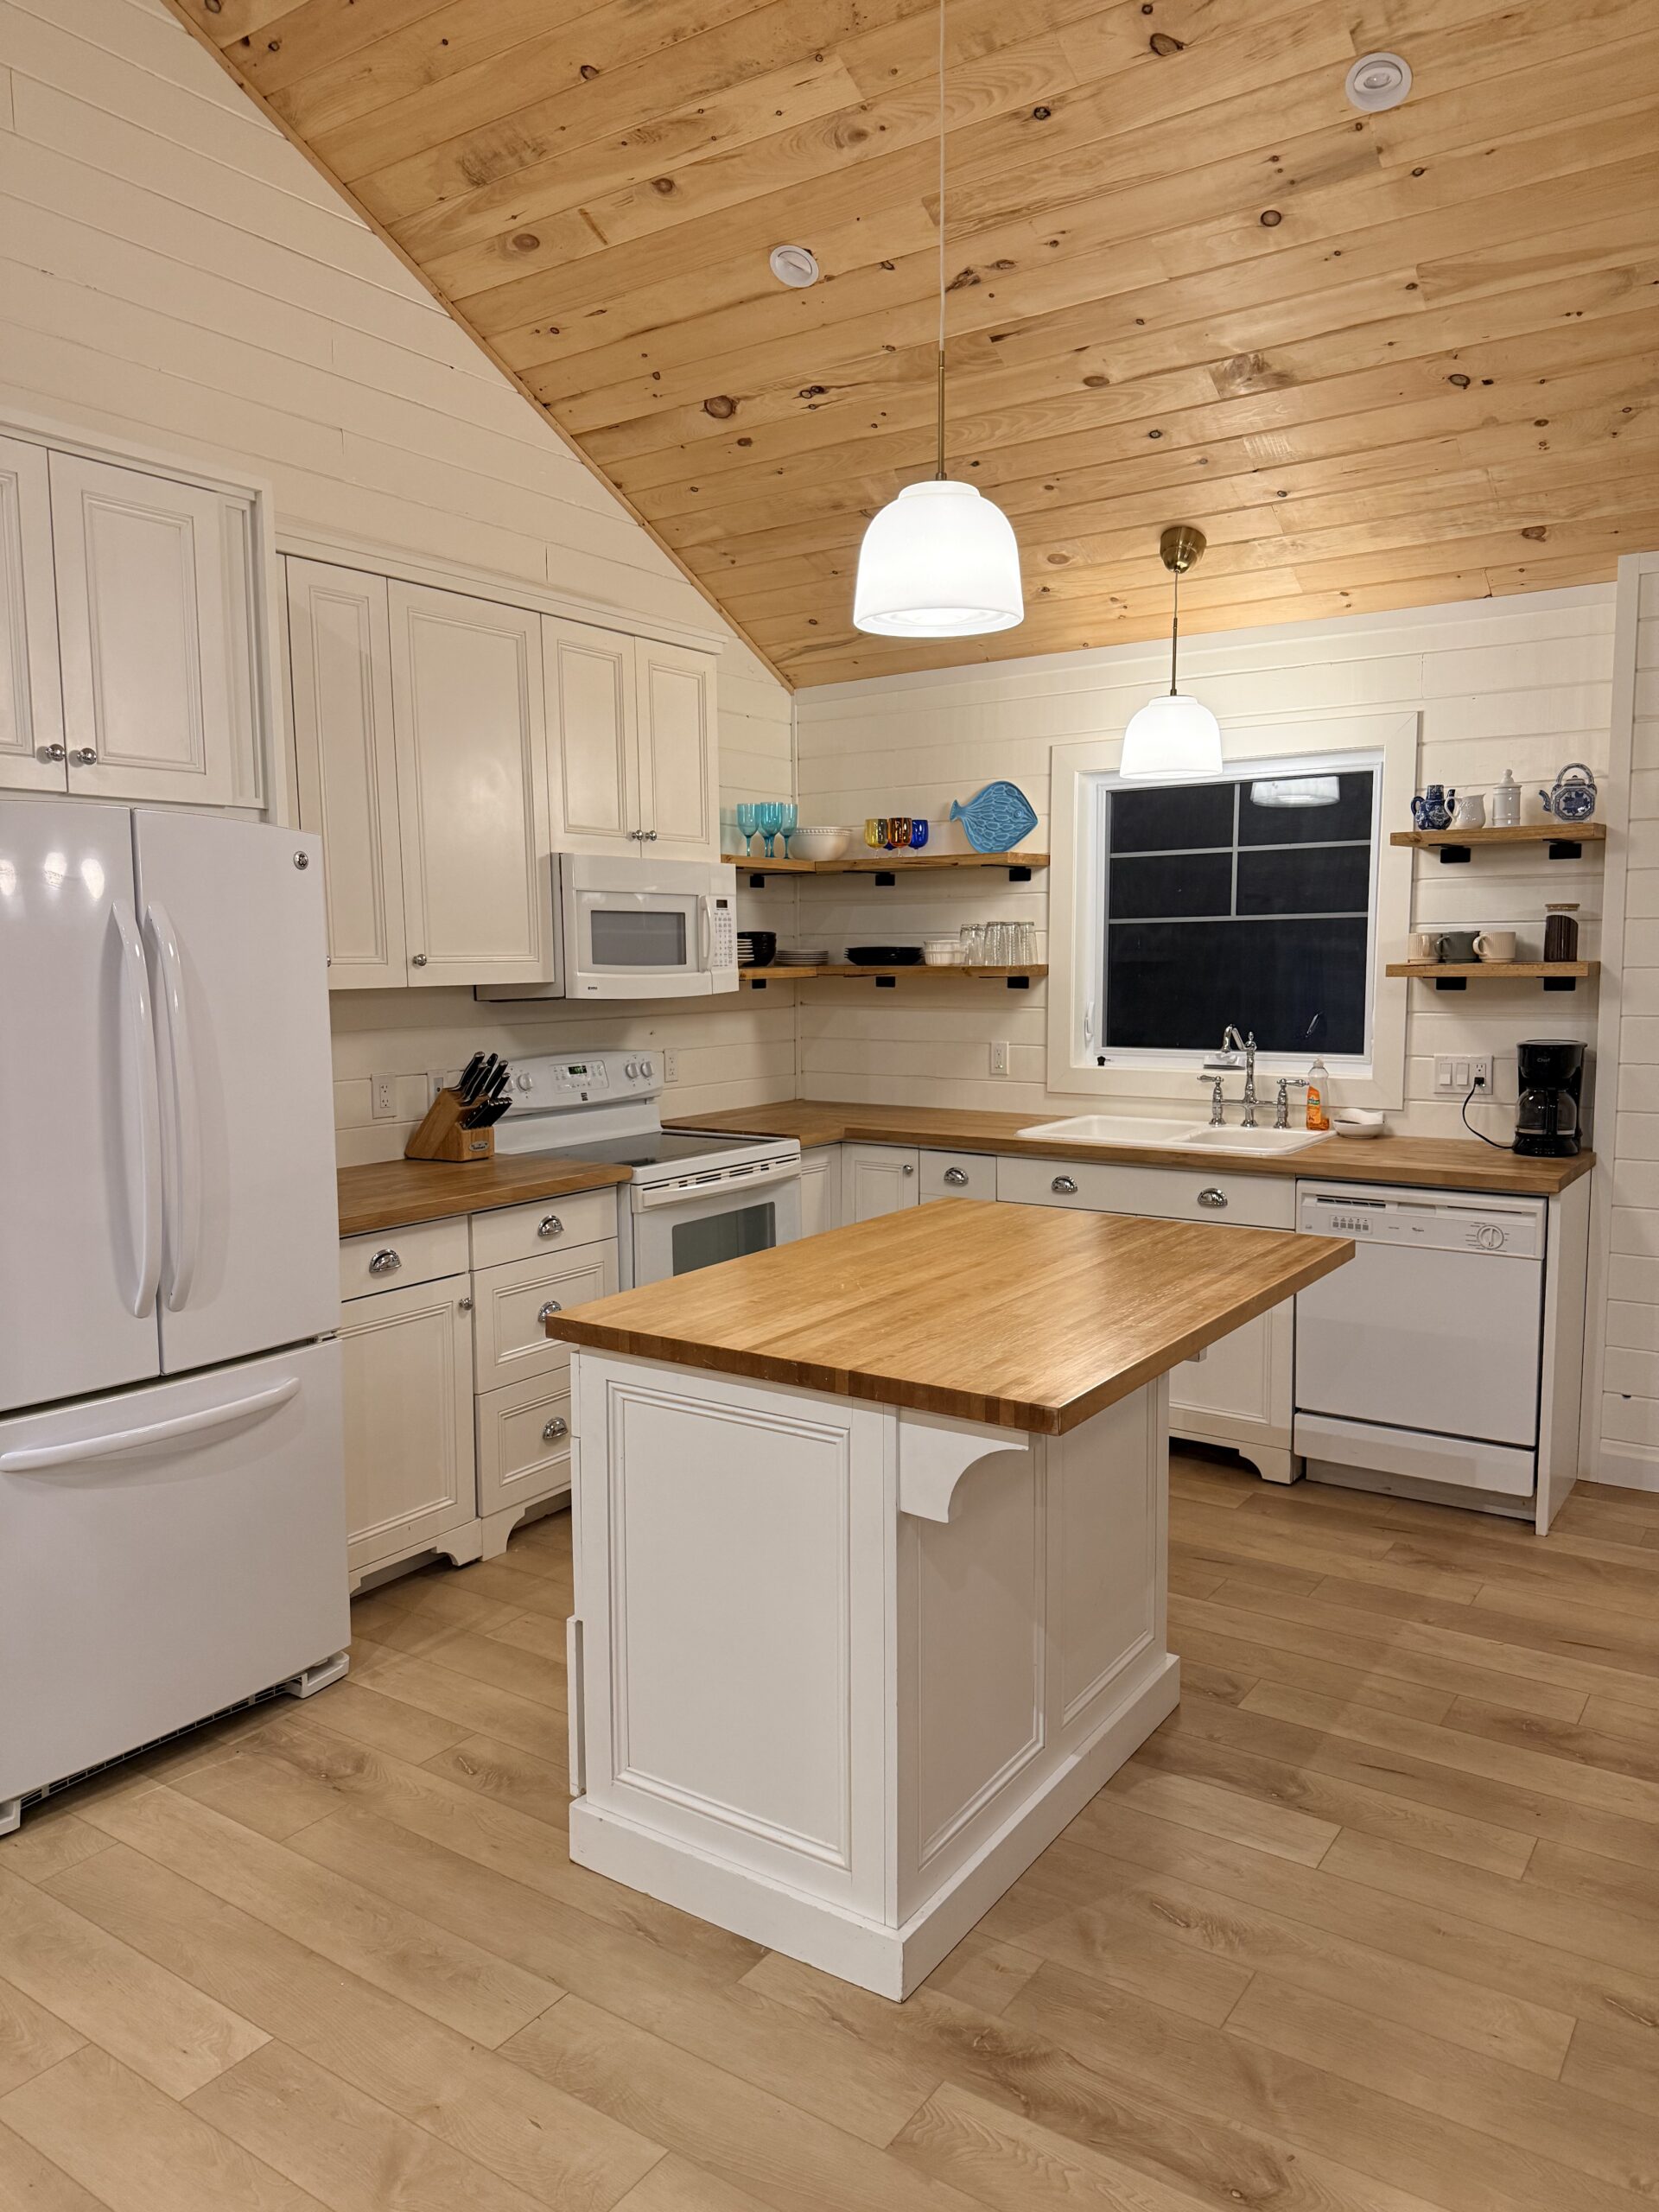
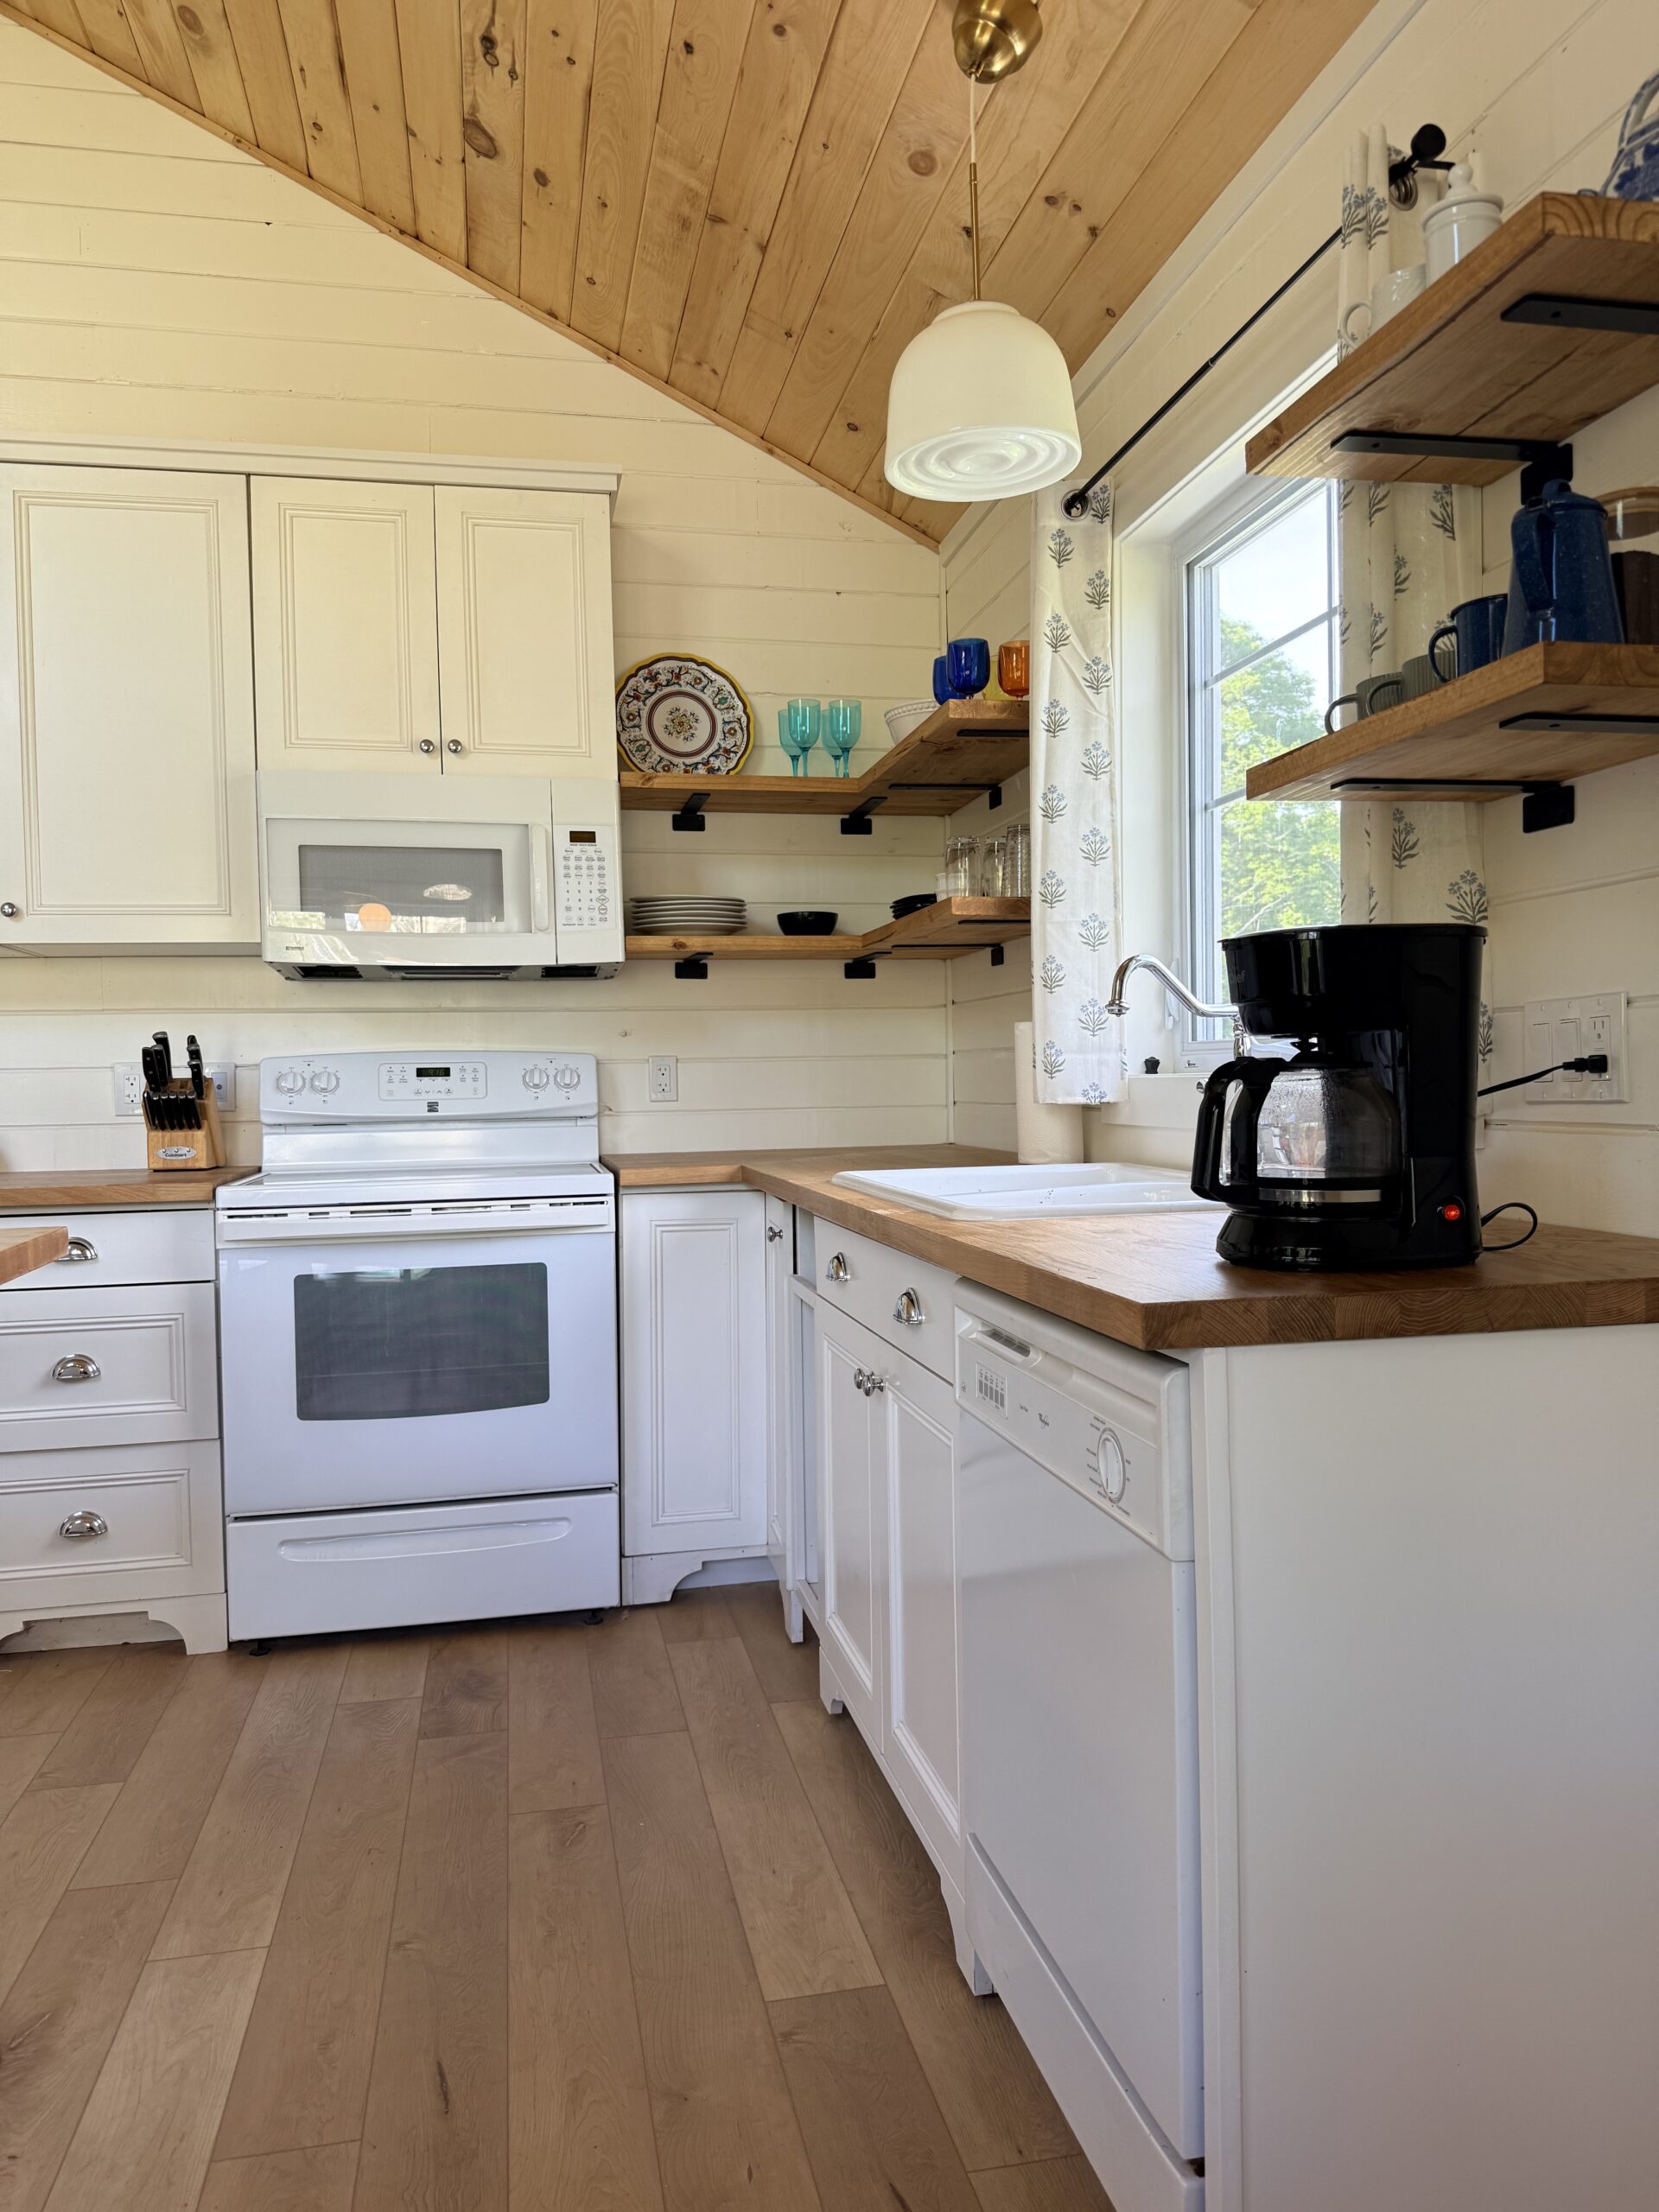
We are submitting a kitchen flip! We are so pleased with how our refurbished kitchen turned out in our new cottage we wanted to share it.
We got our kitchen from Habitat several months ago. We were able to reconfigure many of the cabinets to fit our cottage kitchen. We had to add a few pieces here and there but with some colour matched paint, some new countertop and a few open shelves we now have a cozy cottage kitchen! We love how it gives our cottage a lived in feel despite being a new build and it was a great way to recycle this cabinets and save some budget!
2. Ruby Taylor
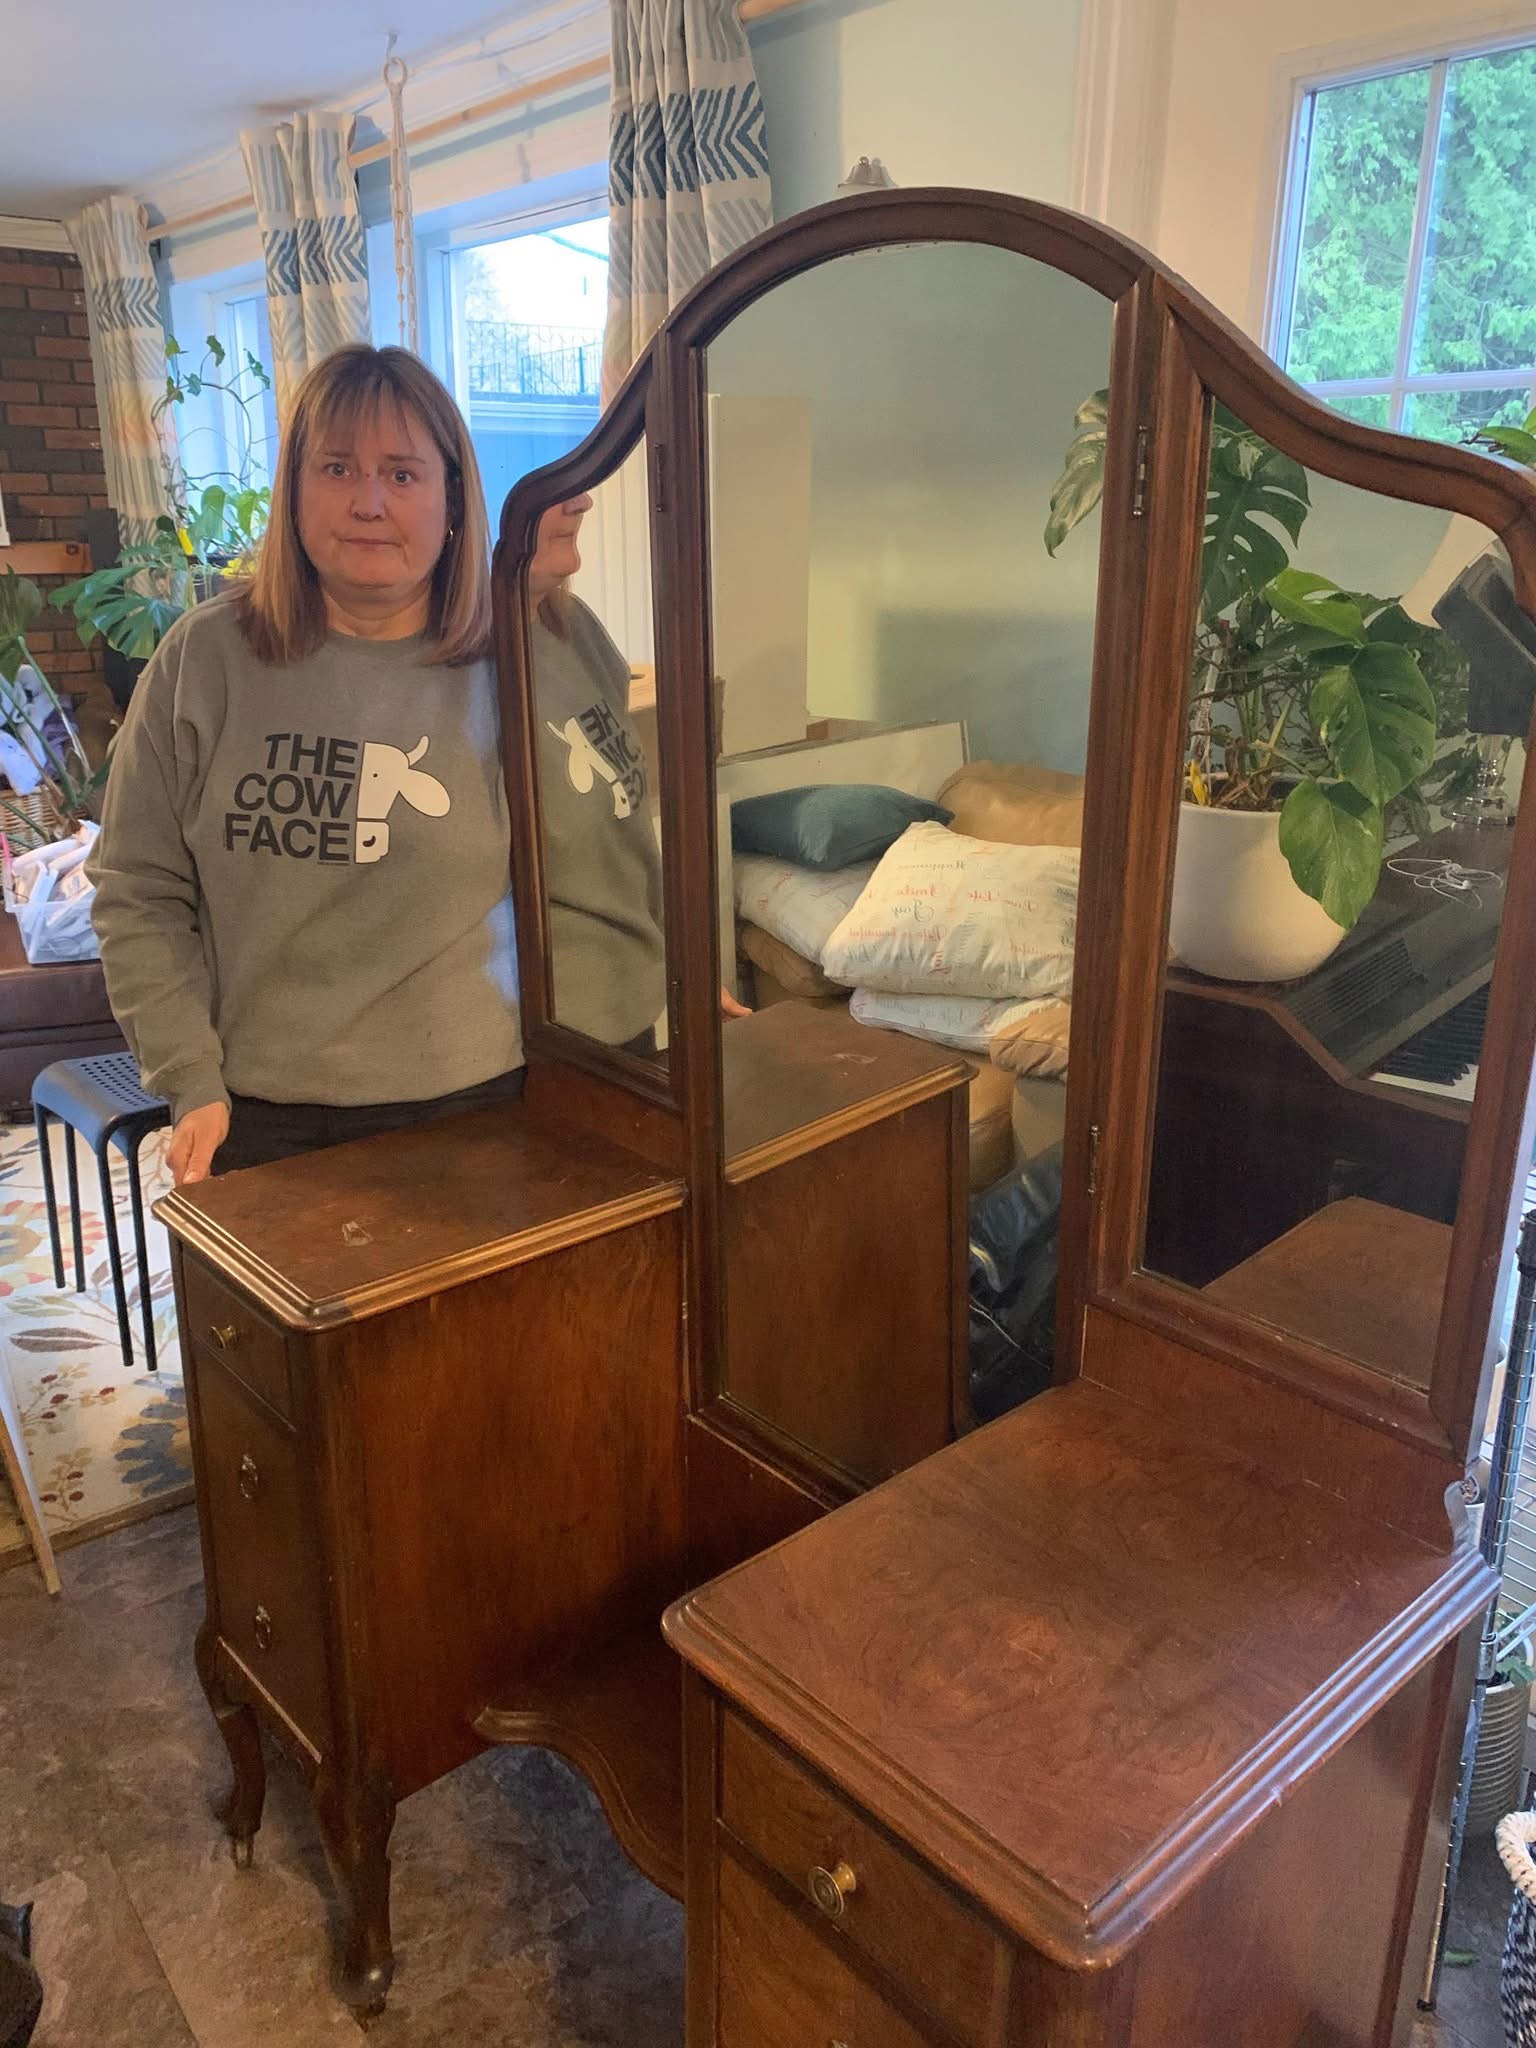
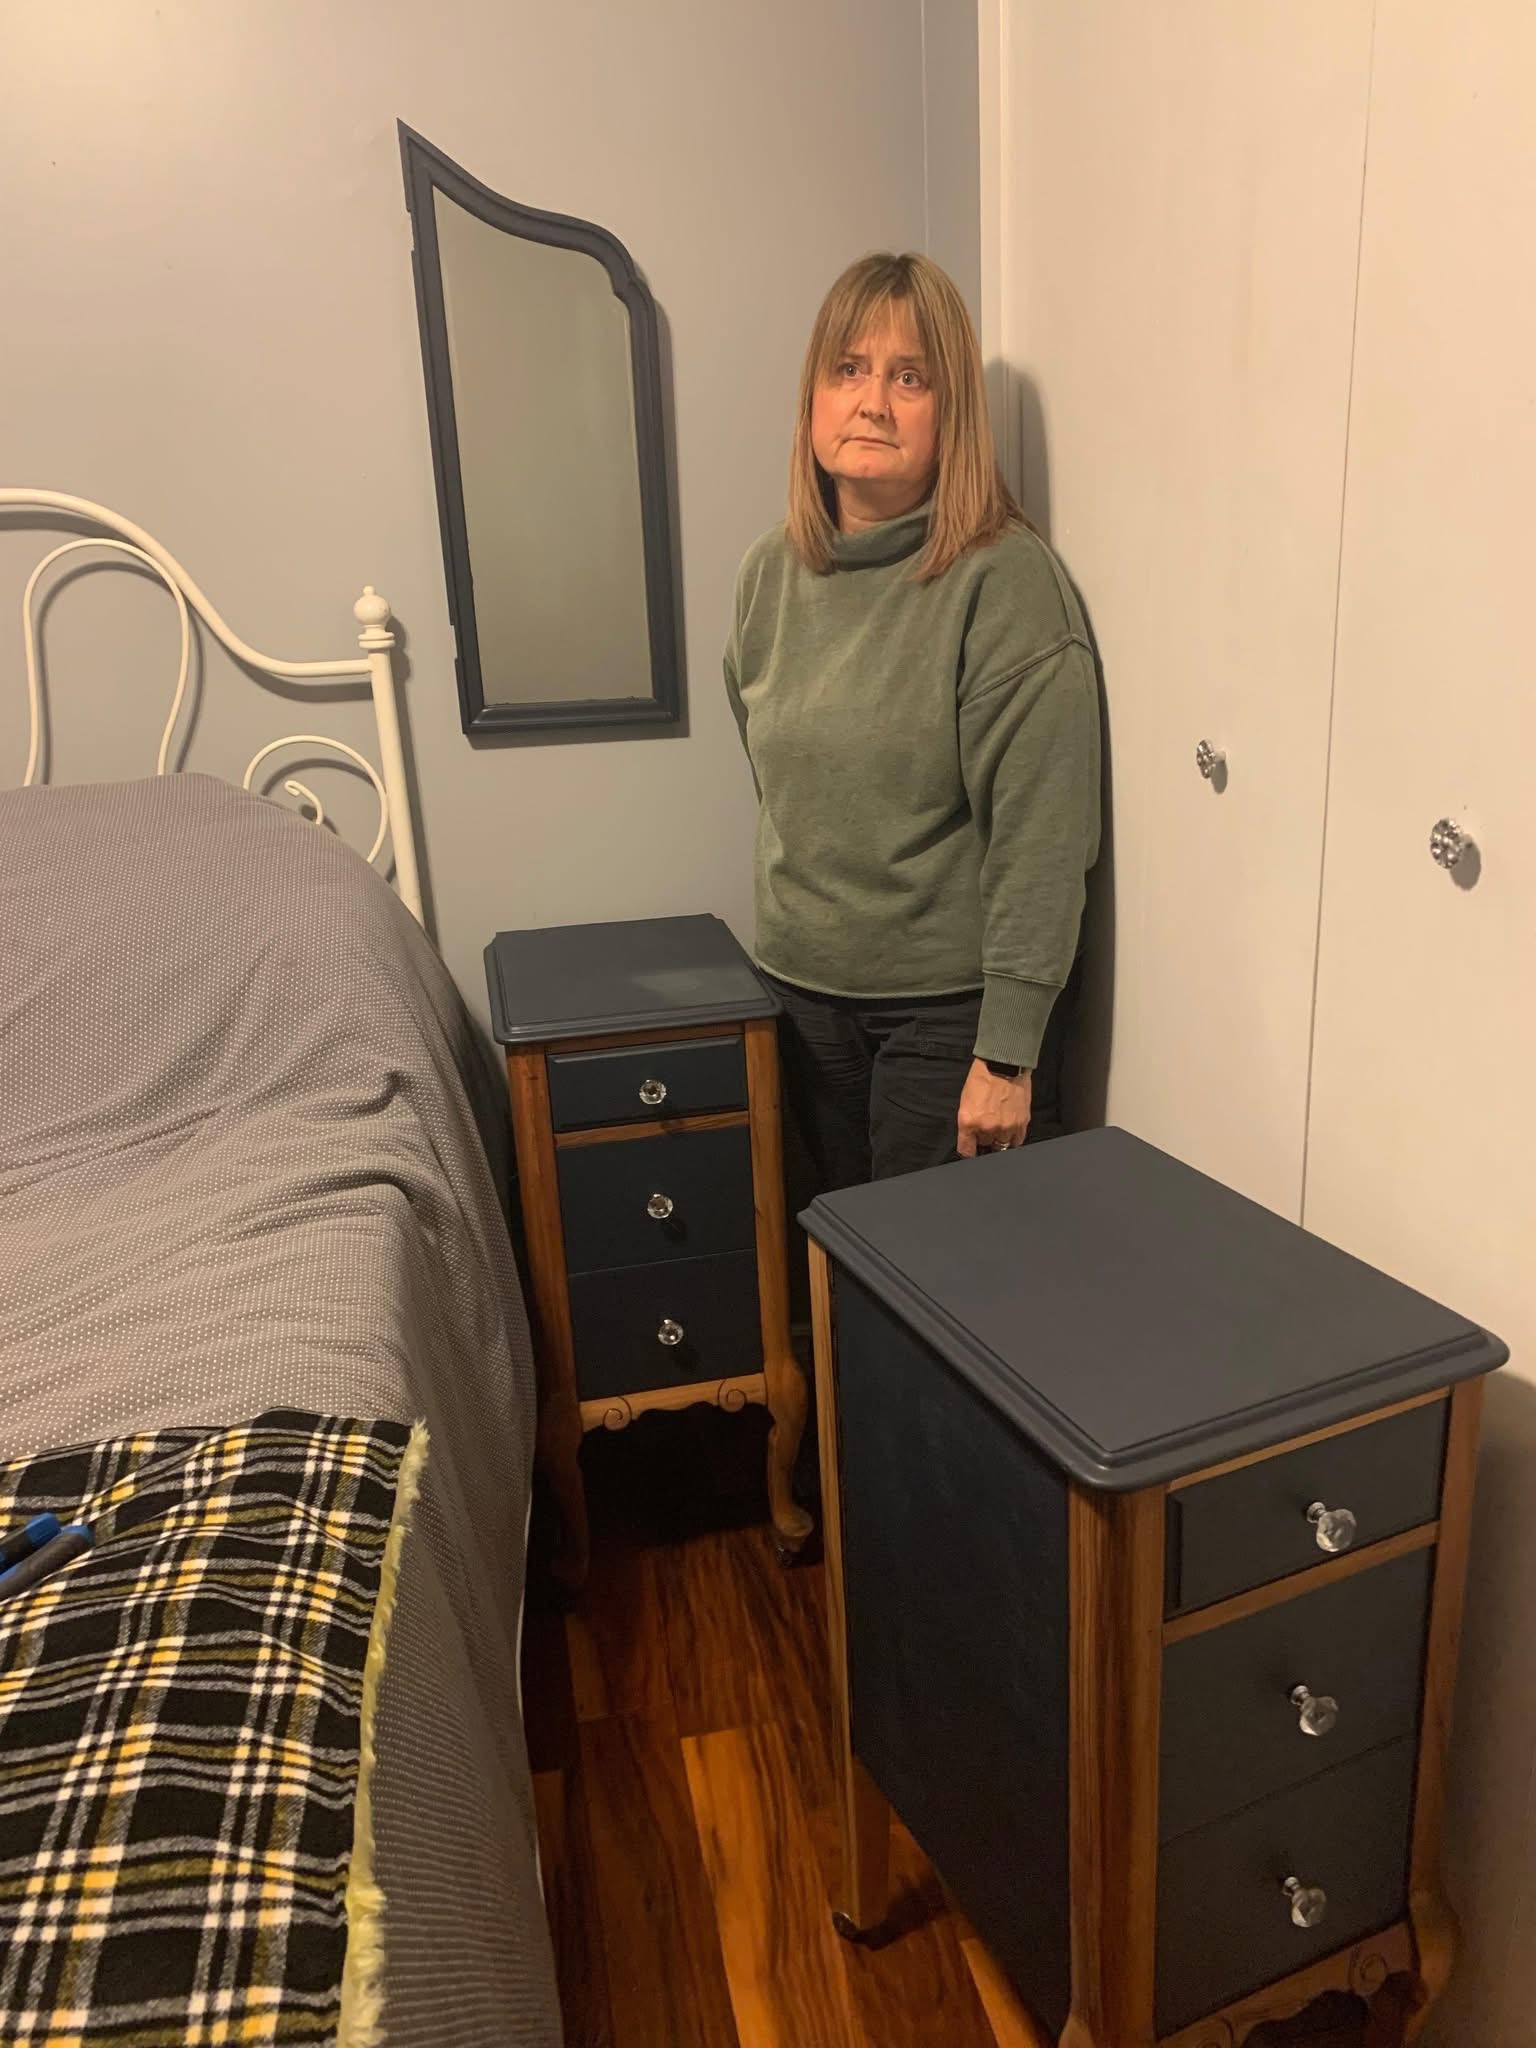
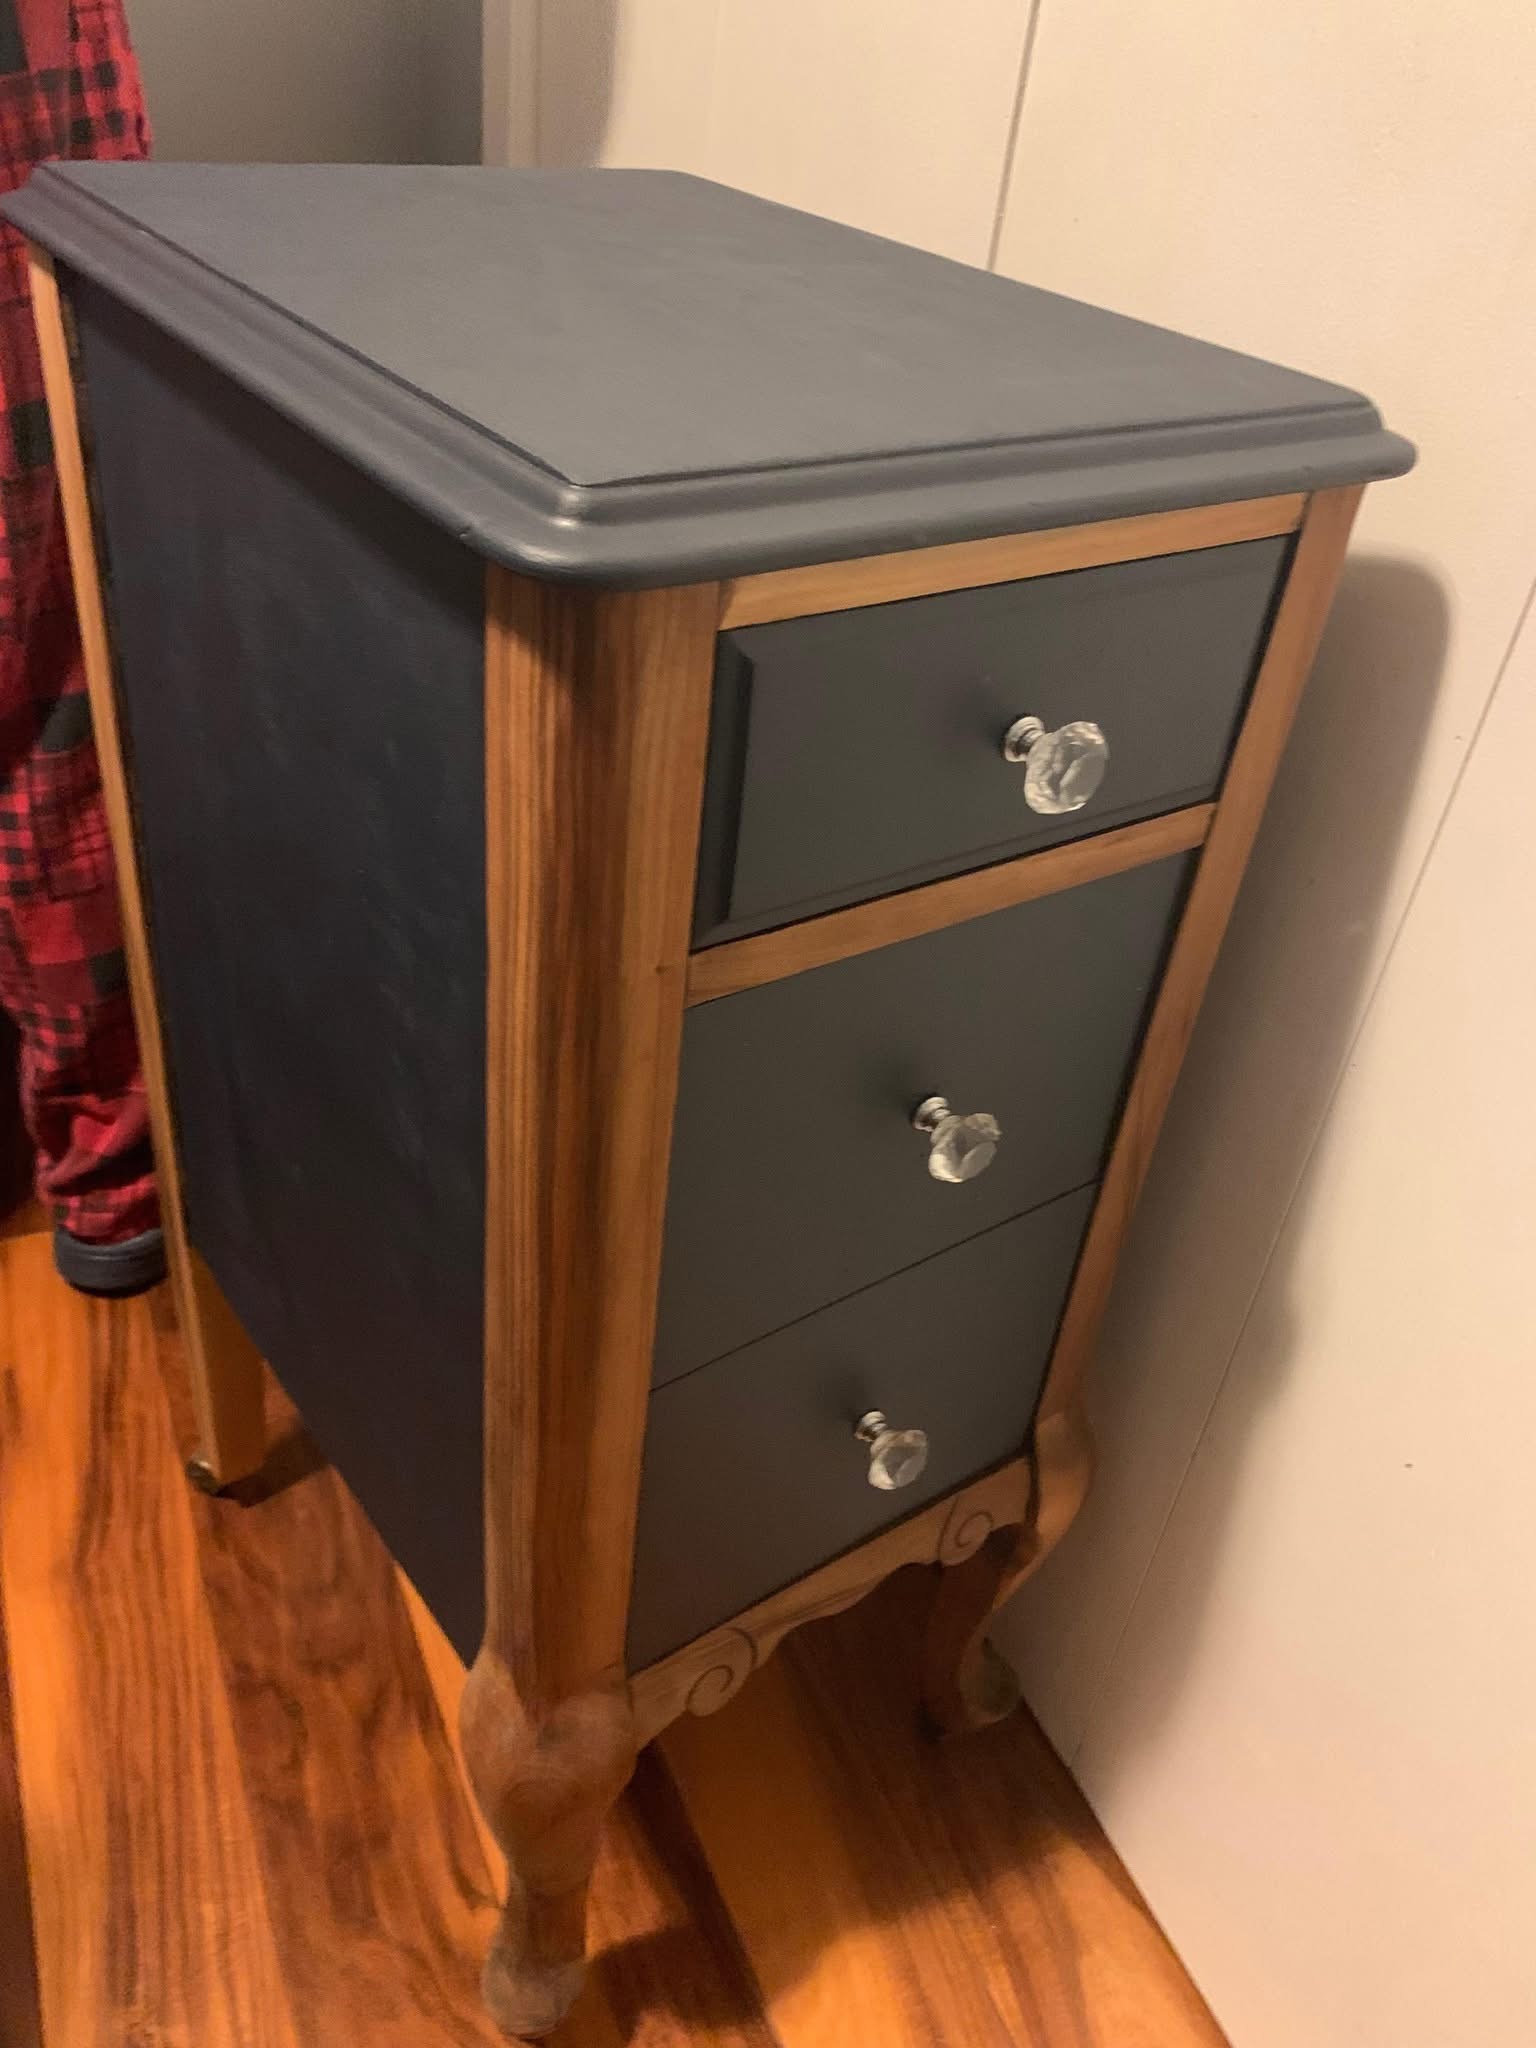
Originally a vanity/dressing table. I transformed it into bedside tables and added some colour.
3. Lorcan Jordan
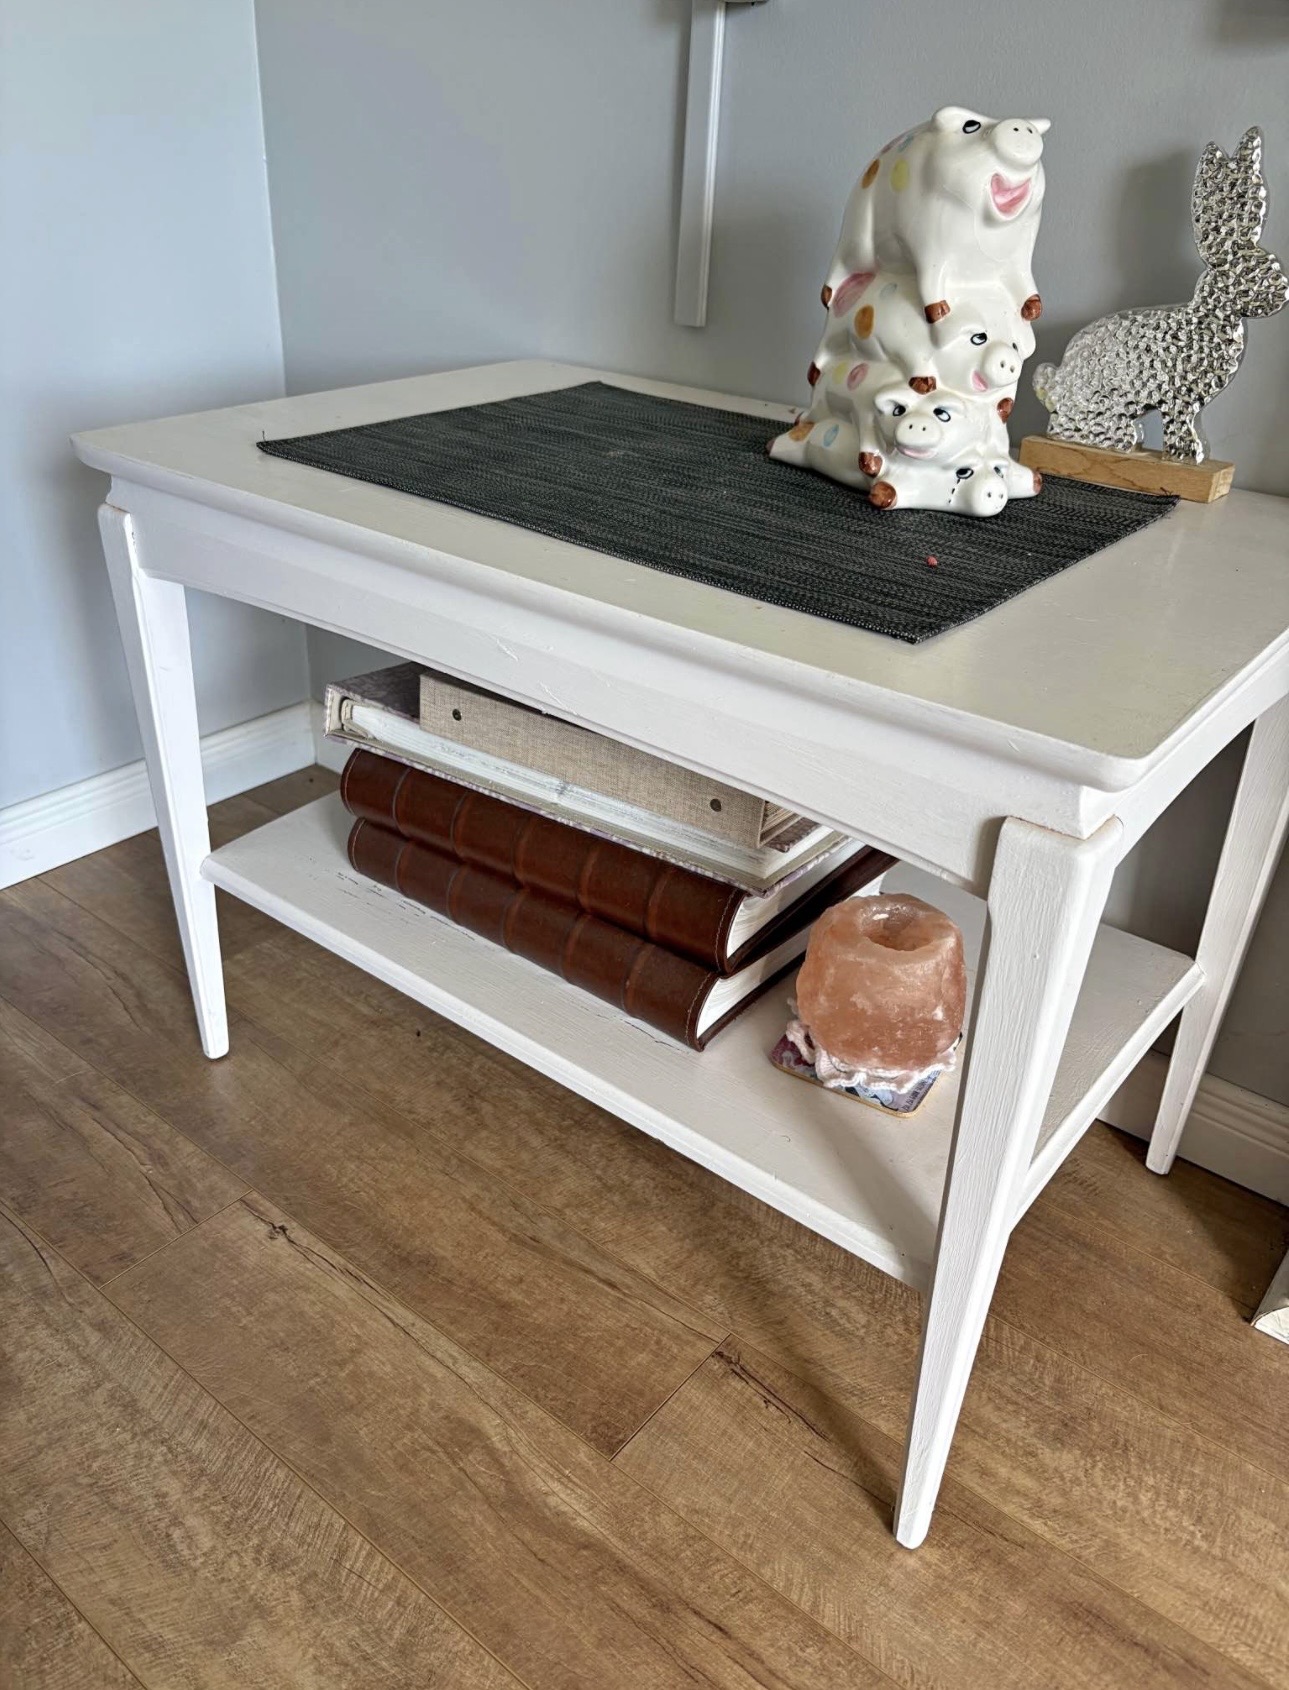
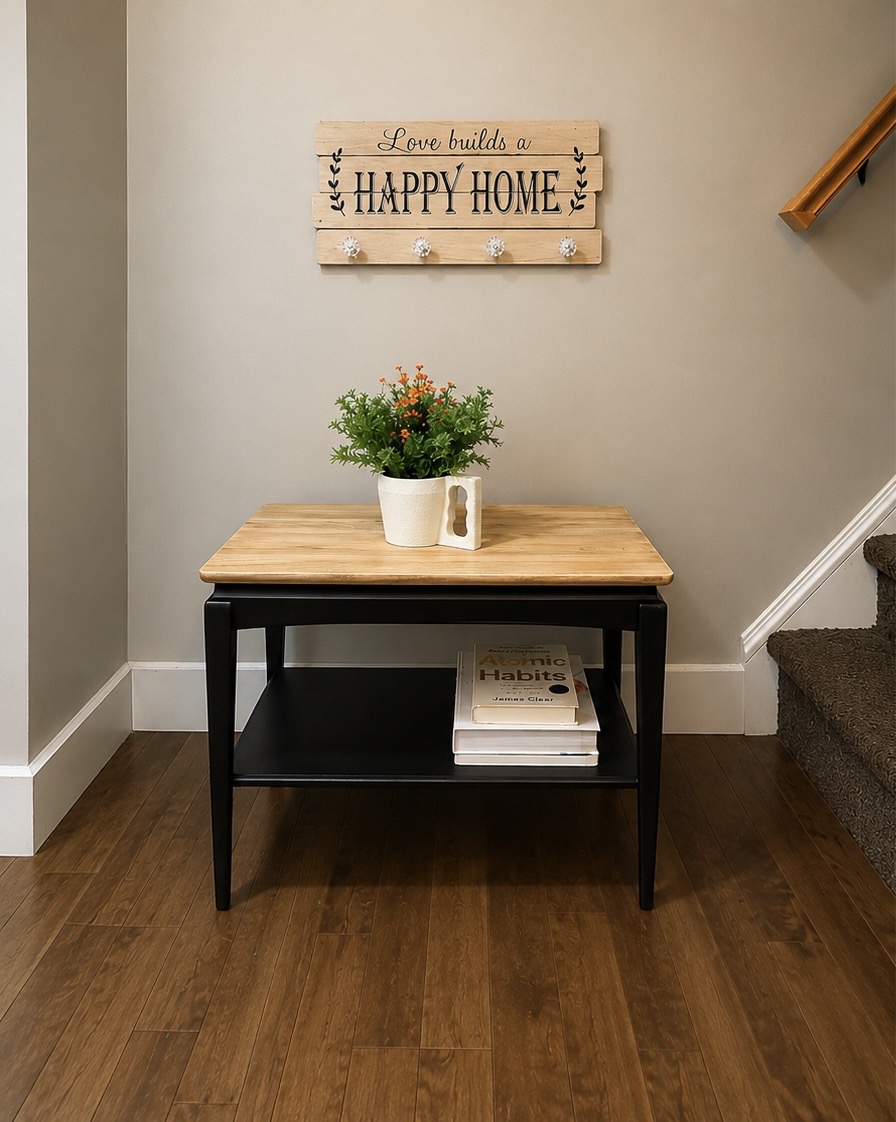
This little table had great bones and lots of potential, but the original white finish was tired and no longer showed off the beauty of the piece. I wanted to give it a fresh, modern look while keeping the warmth and character of the wood. I stripped and sanded the tabletop back to its natural wood, then refinished it to bring out the grain. For contrast, I painted the base and lower shelf a rich matte black and finished the piece with a protective clear coat.
I love how the combination of natural wood and black completely transformed it. What started as a simple, dated table is now a warm, modern and versatile piece that can work as an end table, side table or accent table. Giving furniture a second life and seeing what it can become instead of throwing it away is one of my favourite parts of refinishing.
4. Crystal MacInnis
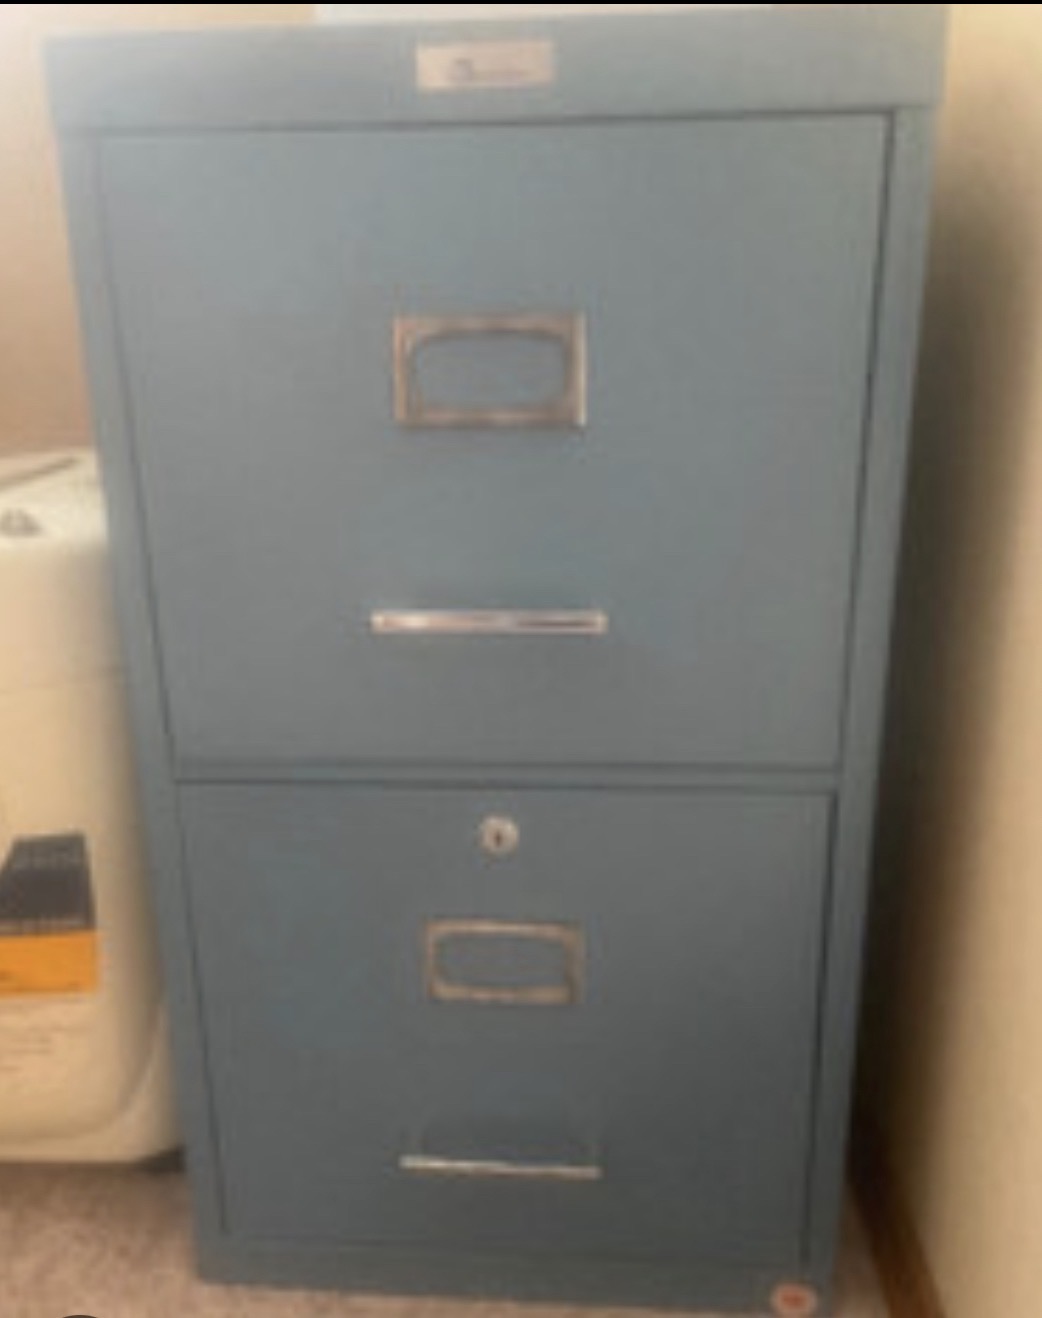
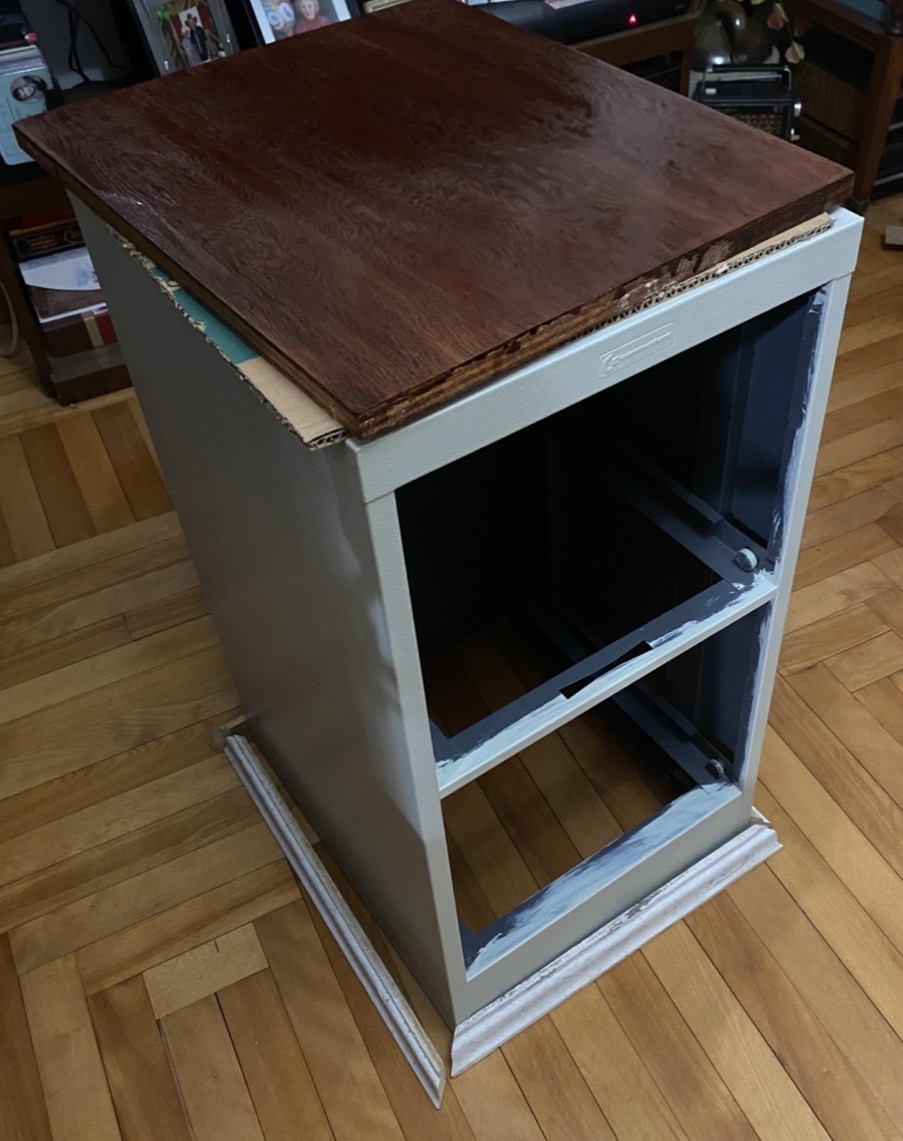
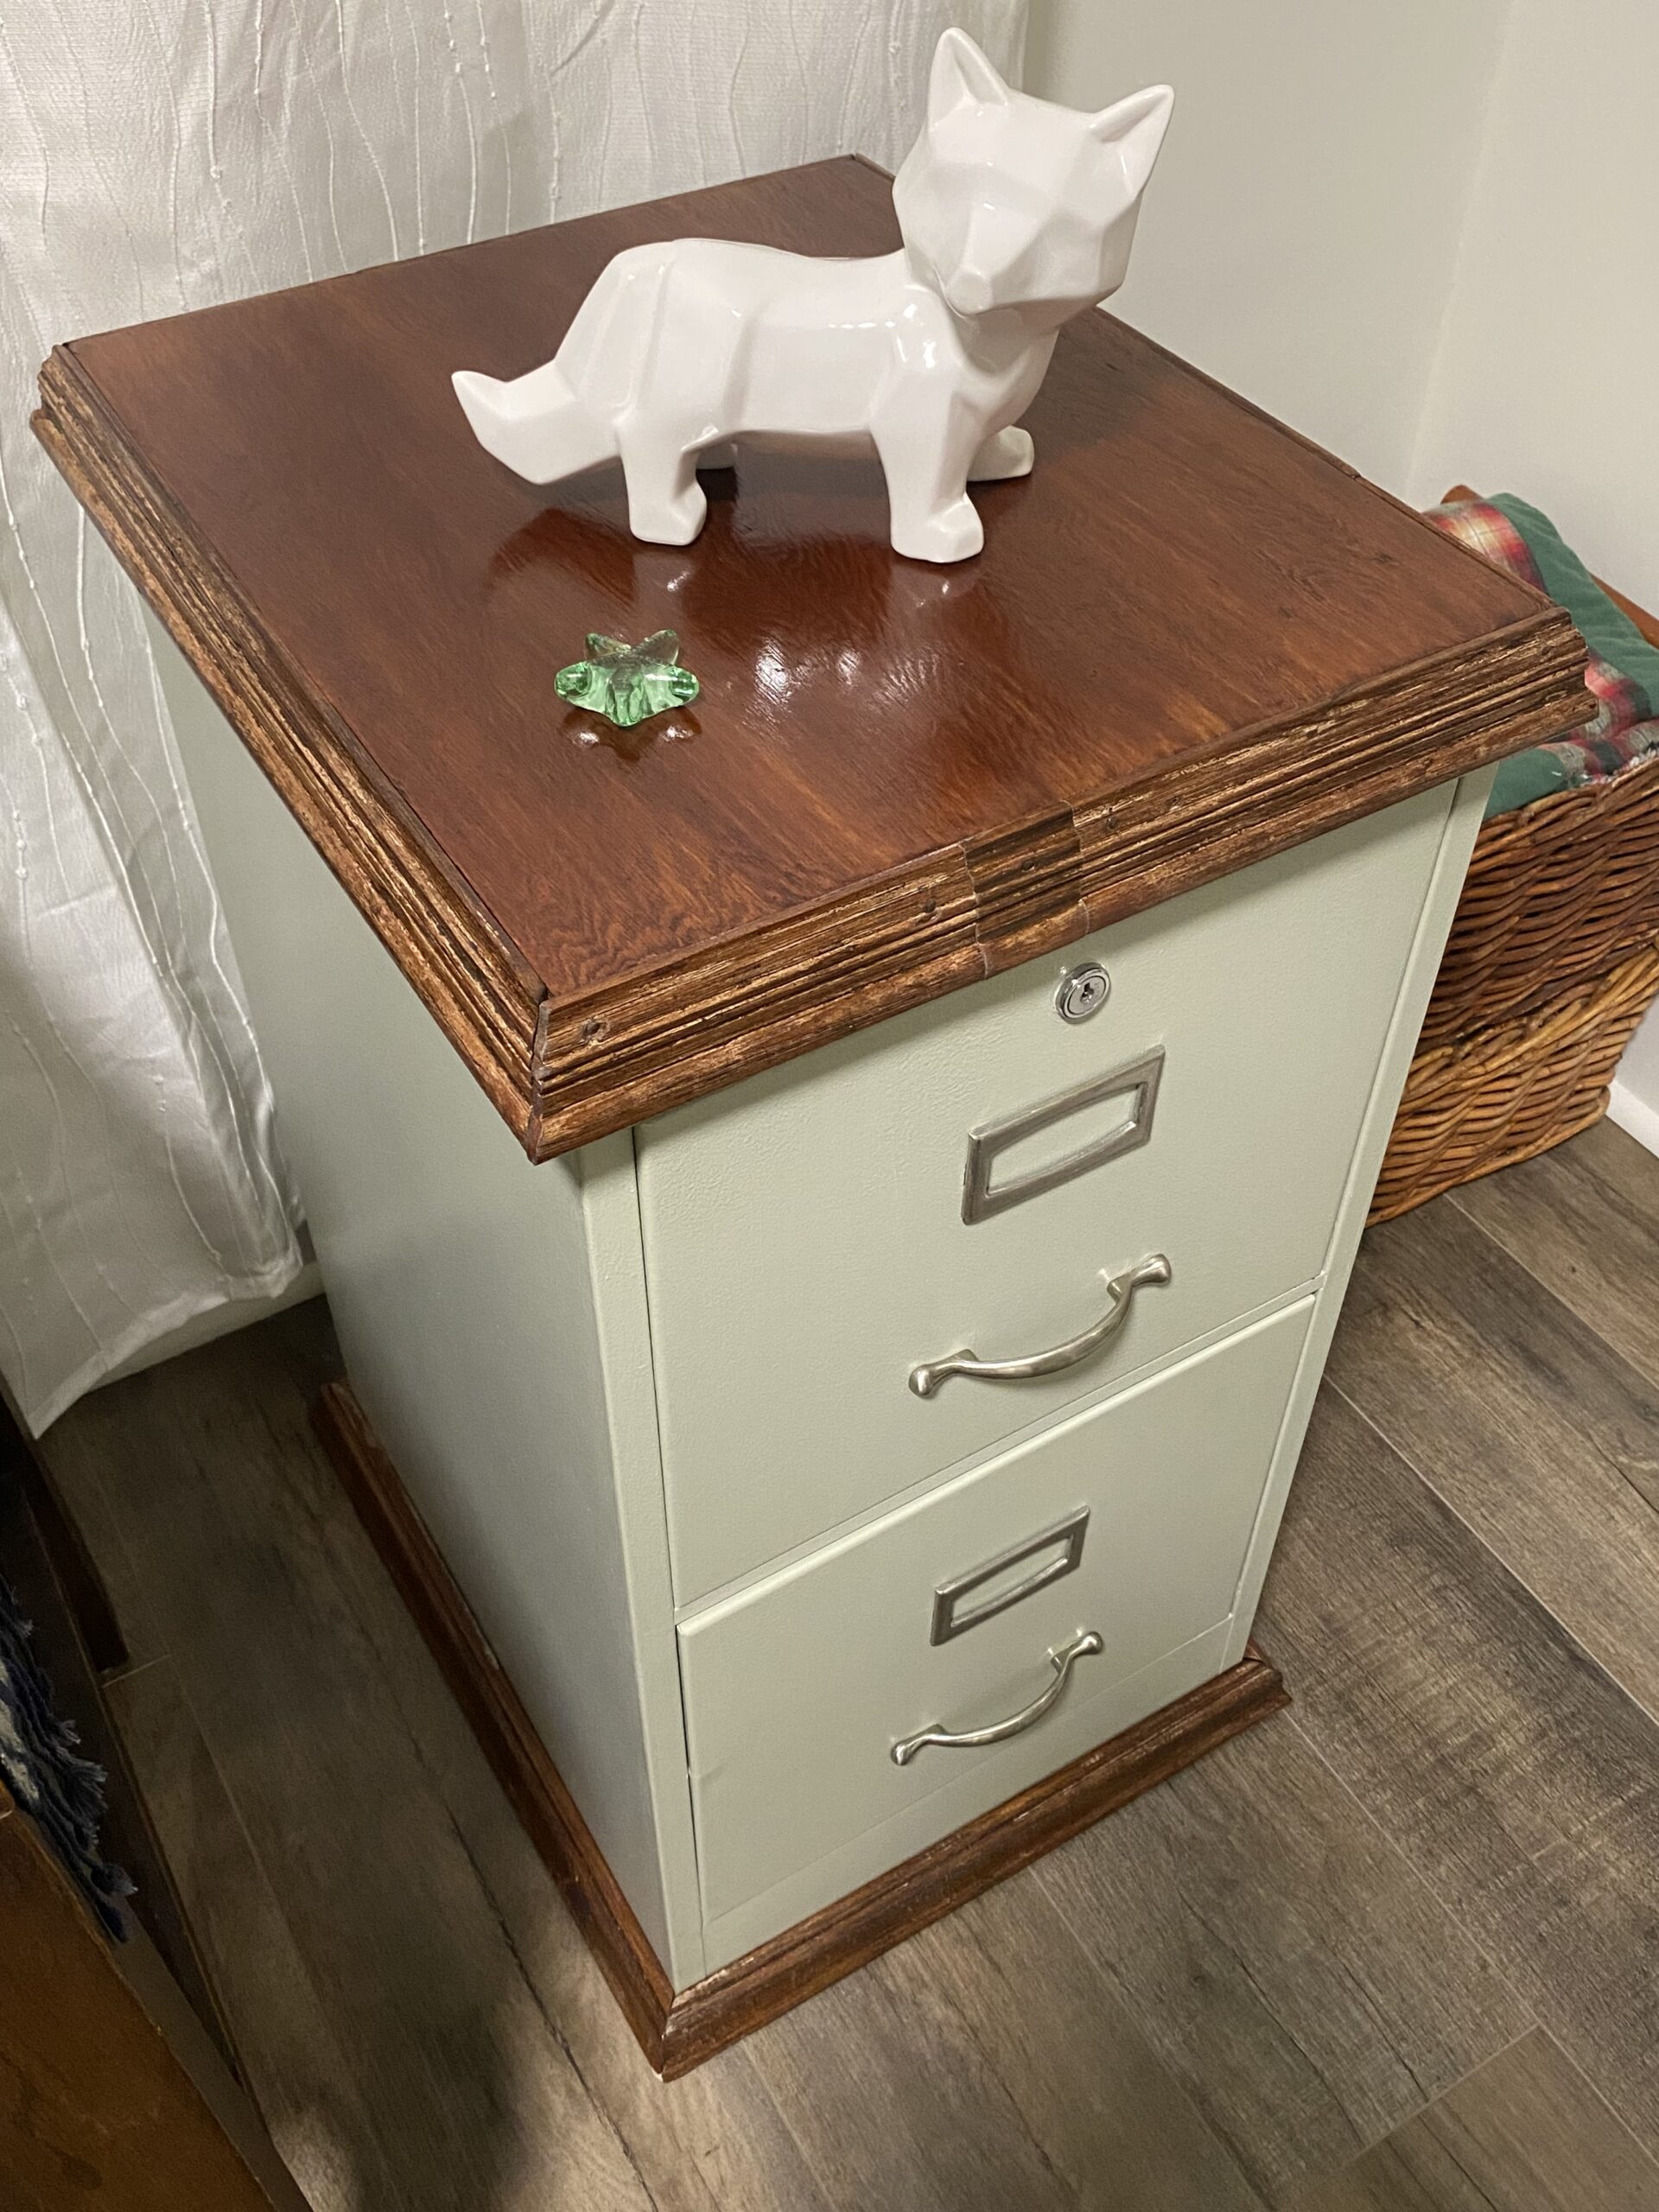
I found a metal filing cabinet that had seen better days and painted it a sage green. The handles were swapped out with brushed nickel drawer pulls and the stainless steel label frames were distressed to match. I used an old board and some antique wood mouldings to give it a new look. Some of the mouldings were stained so I experimented with stain colours to get a close match.
5. Deanna Lowe
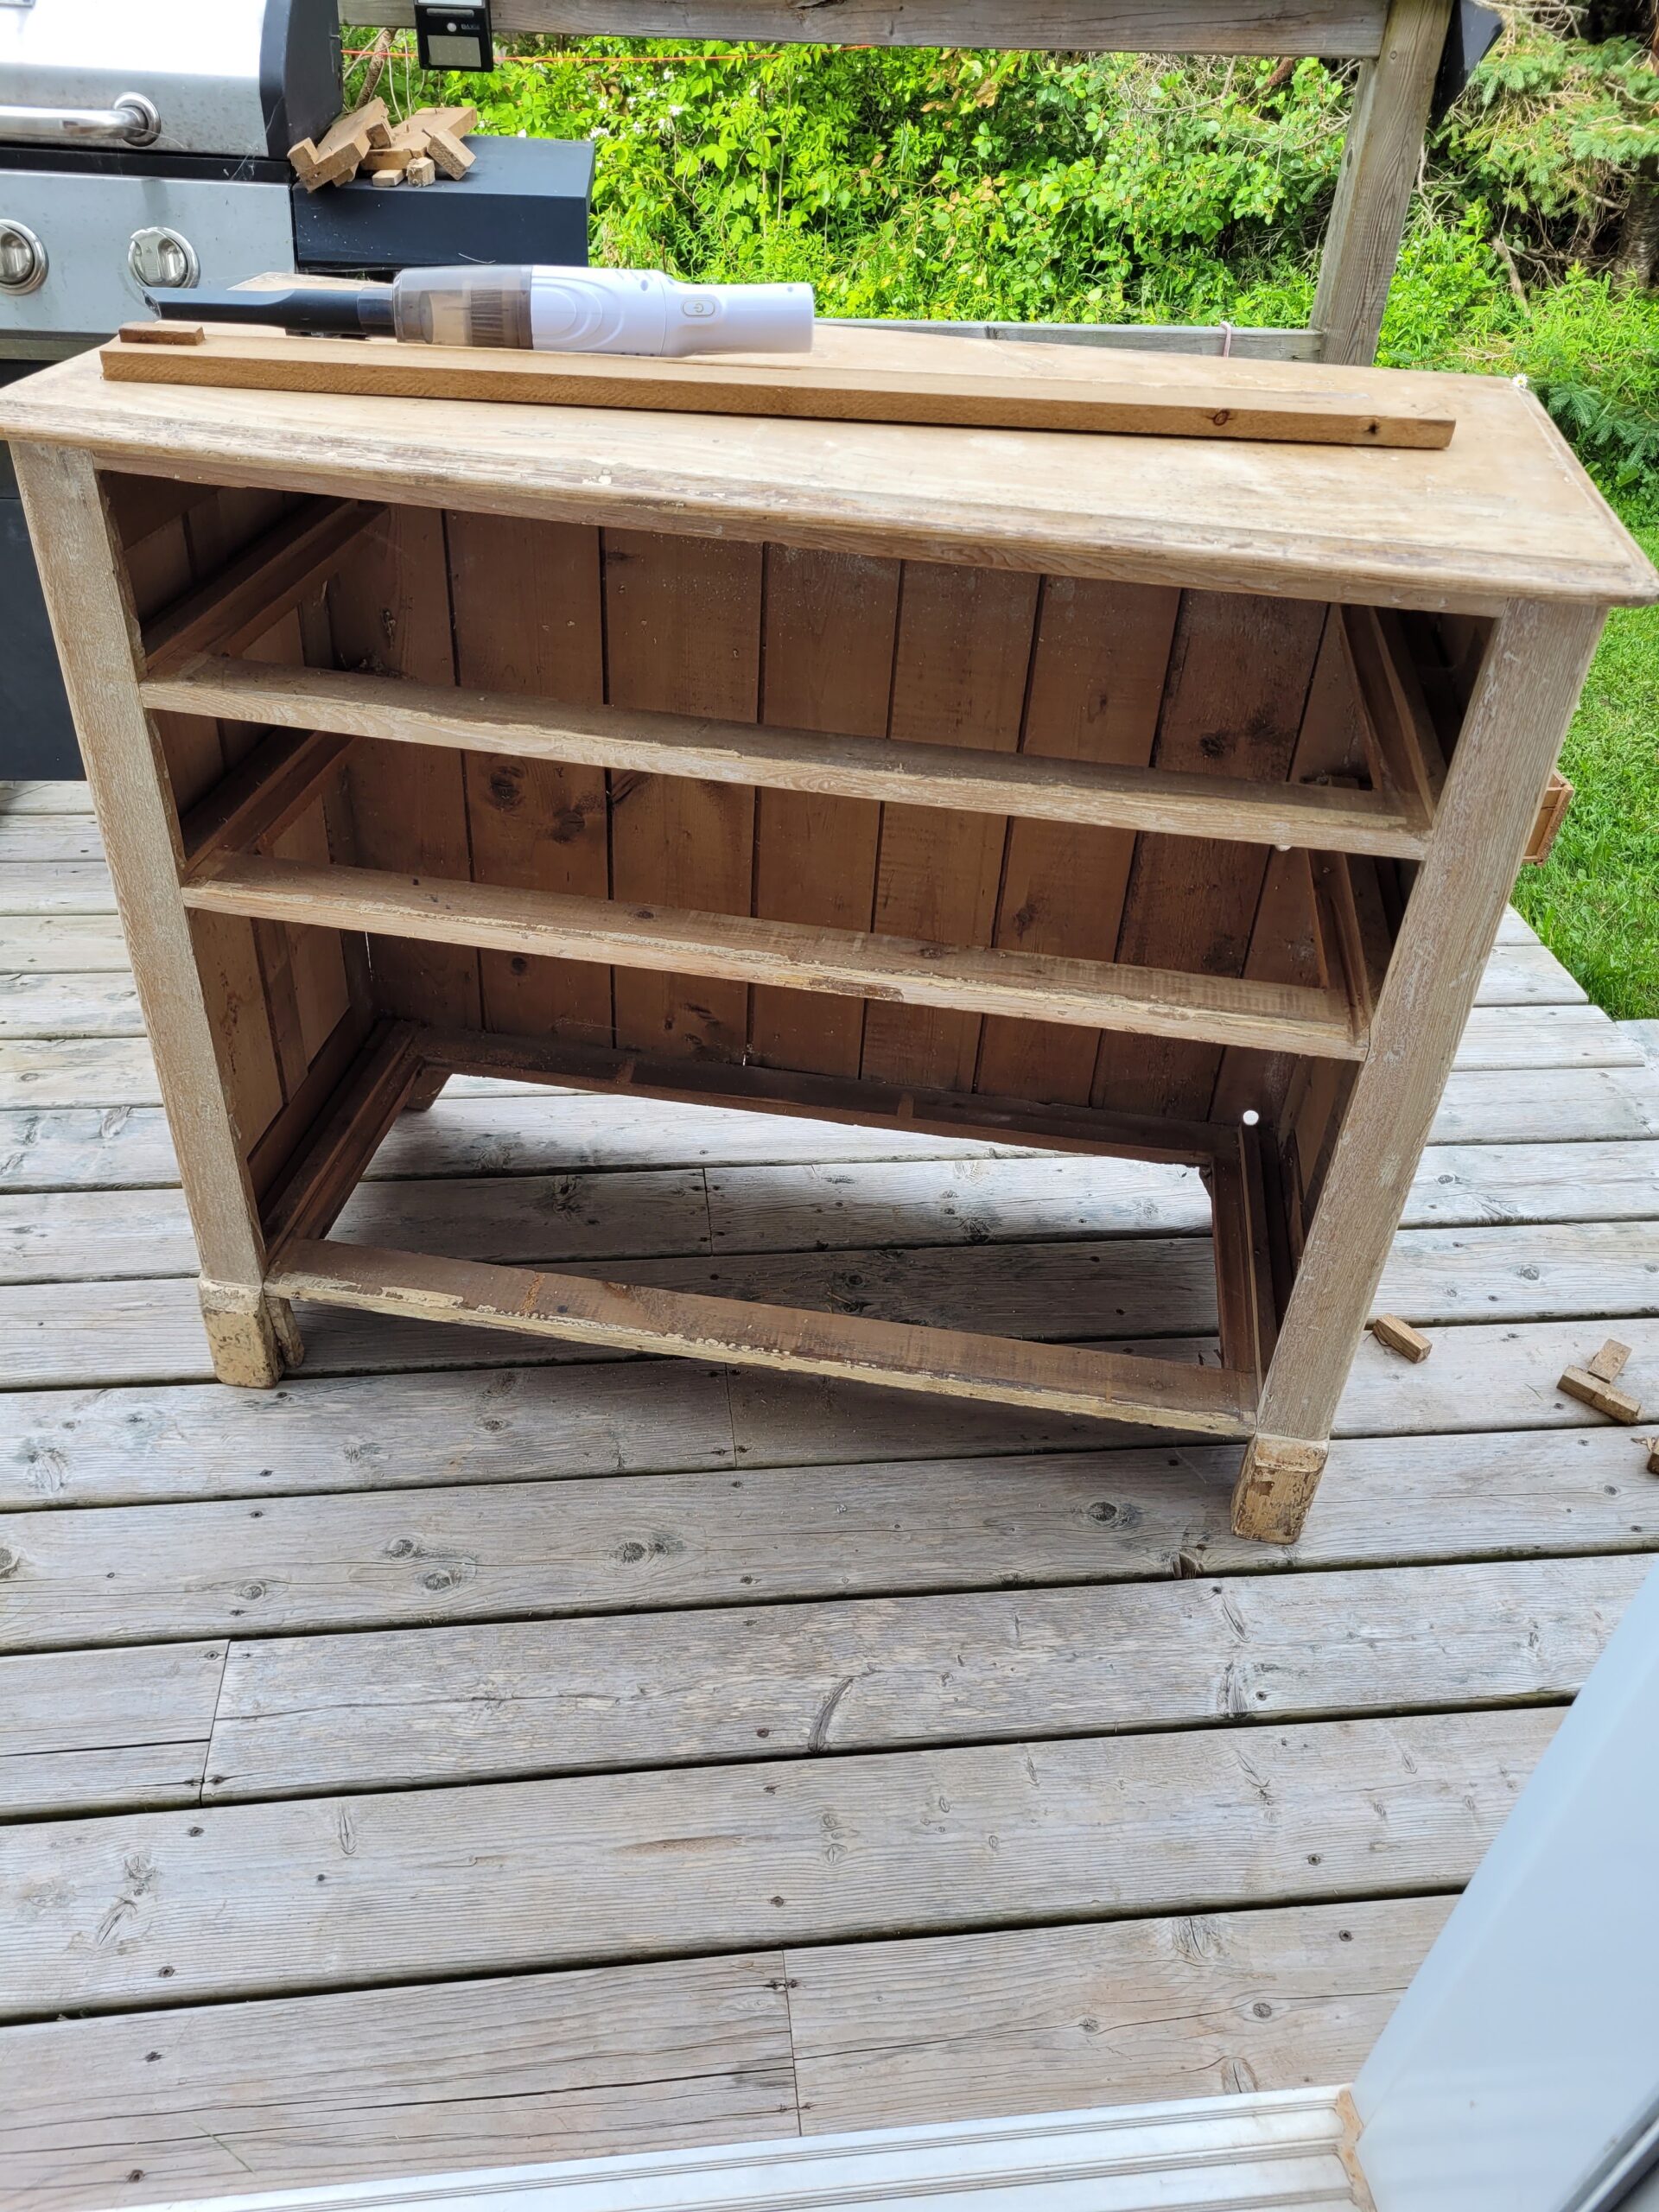
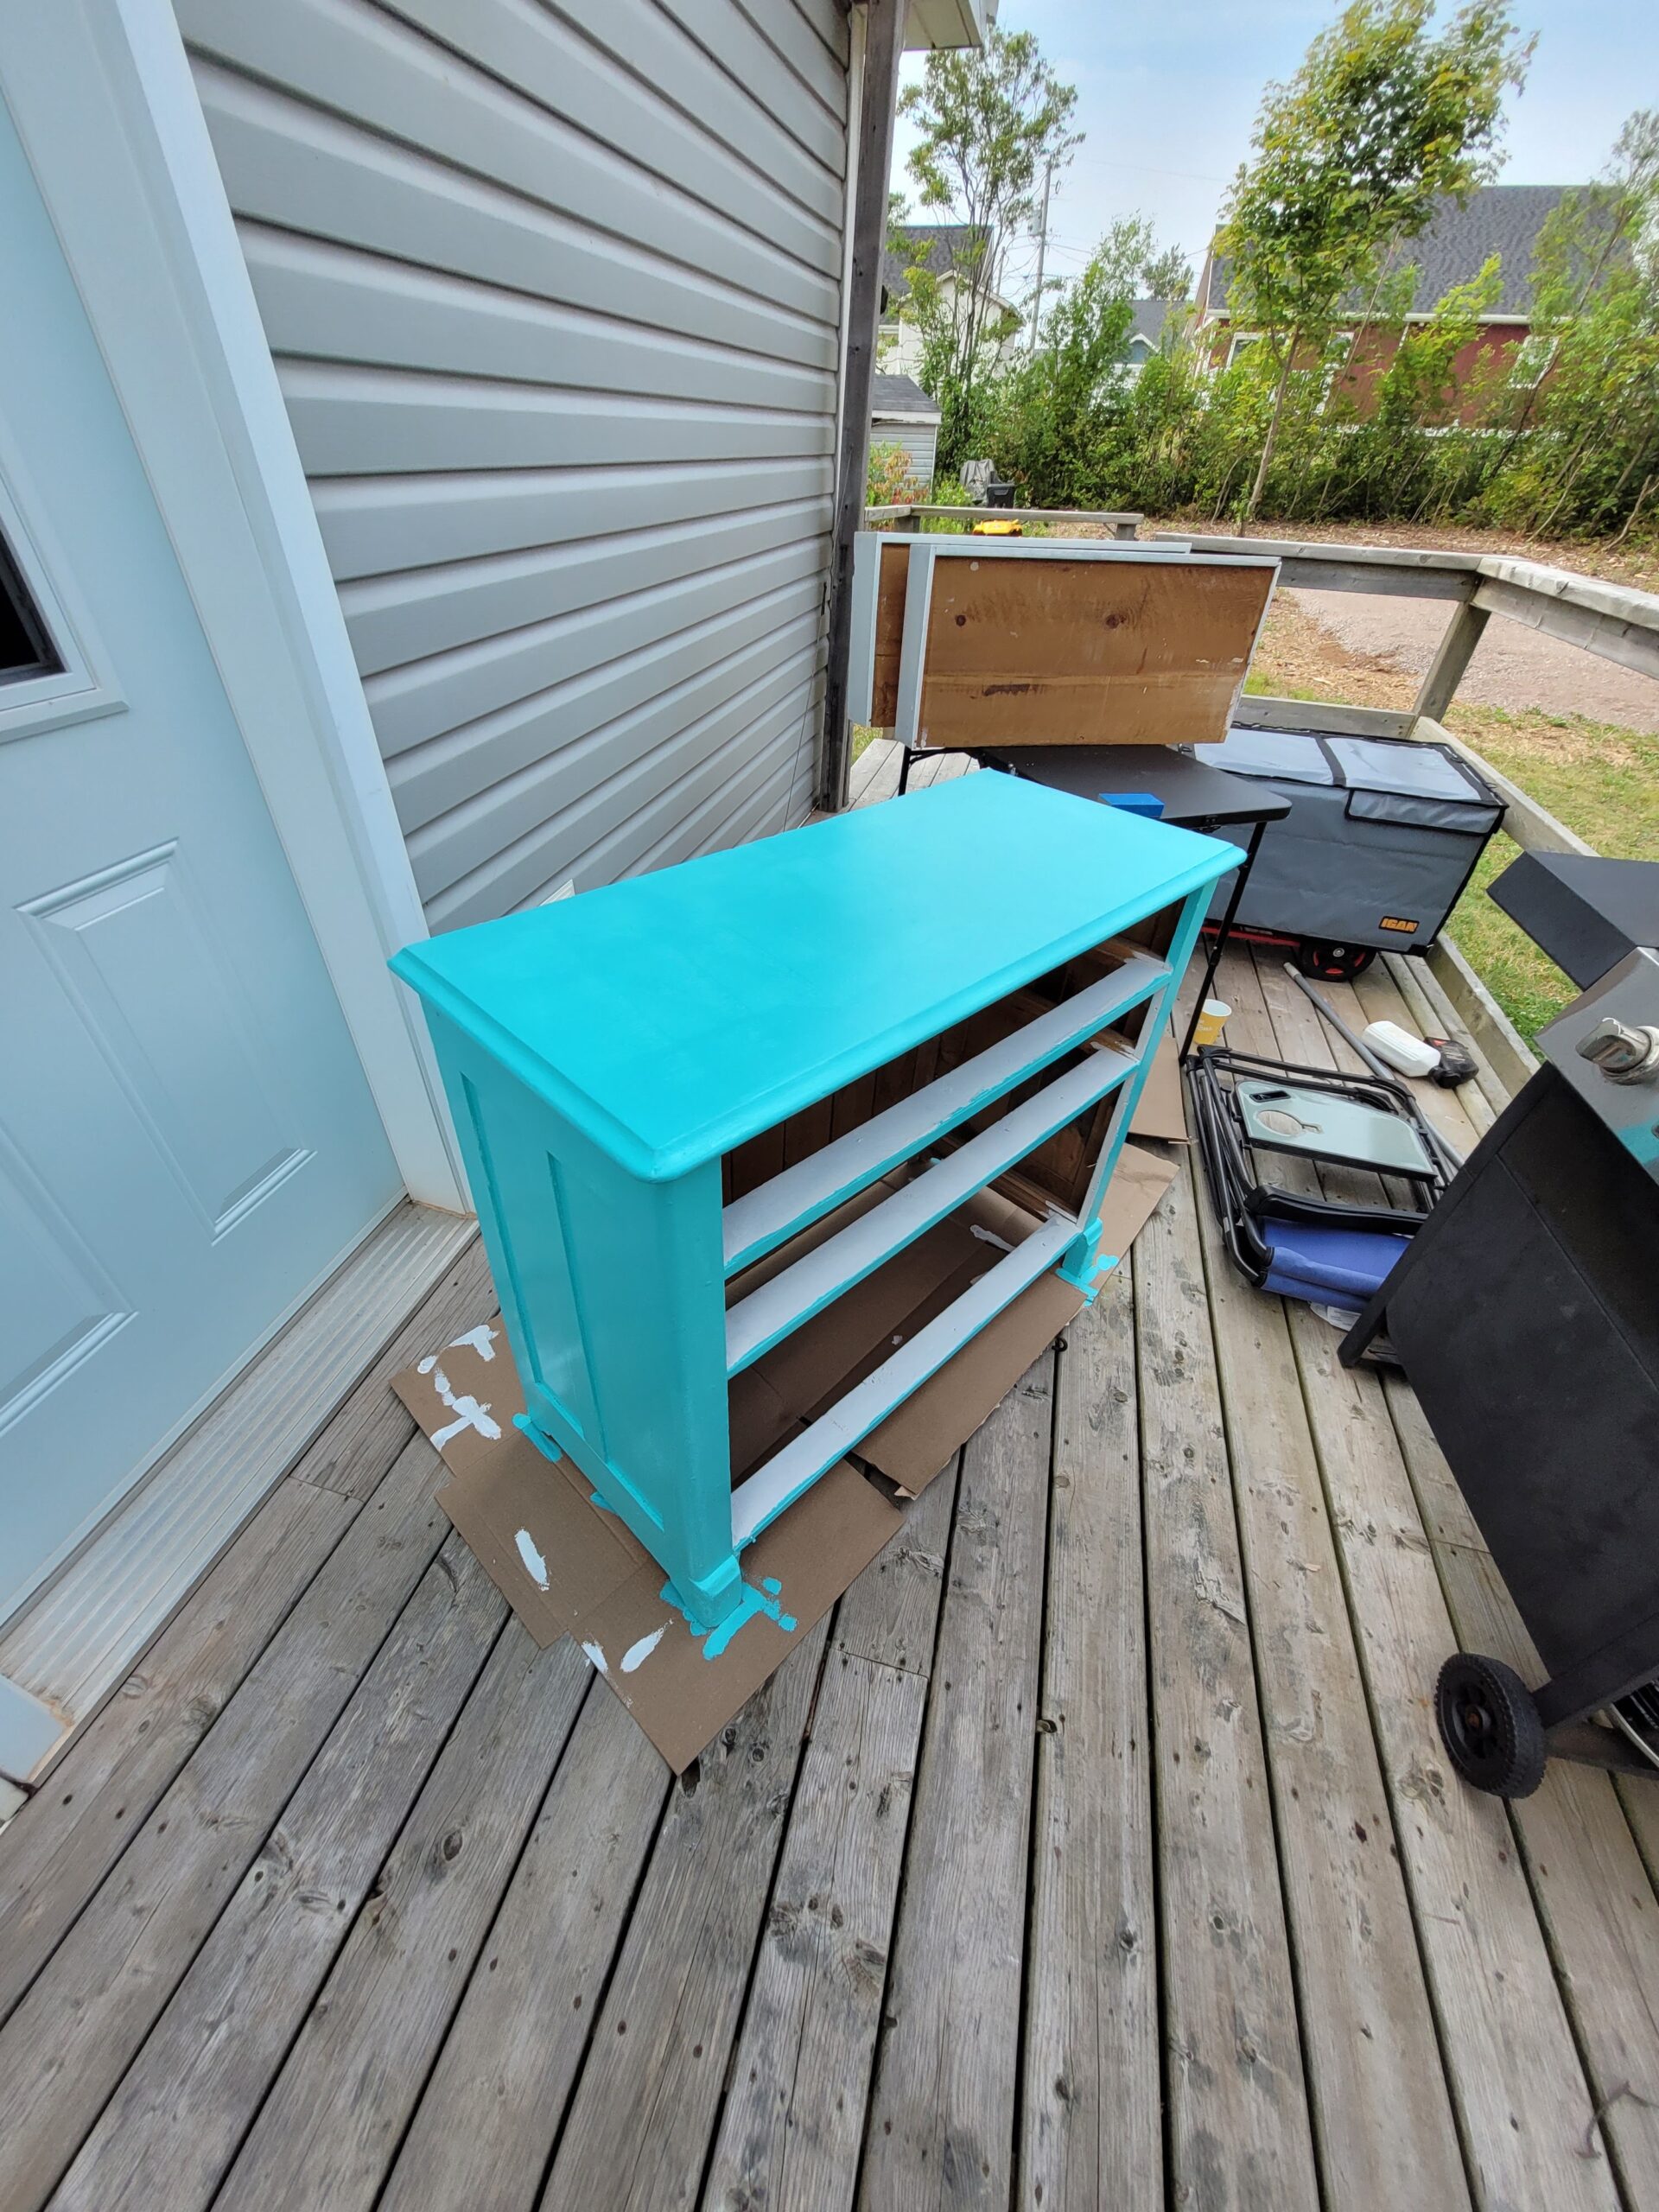
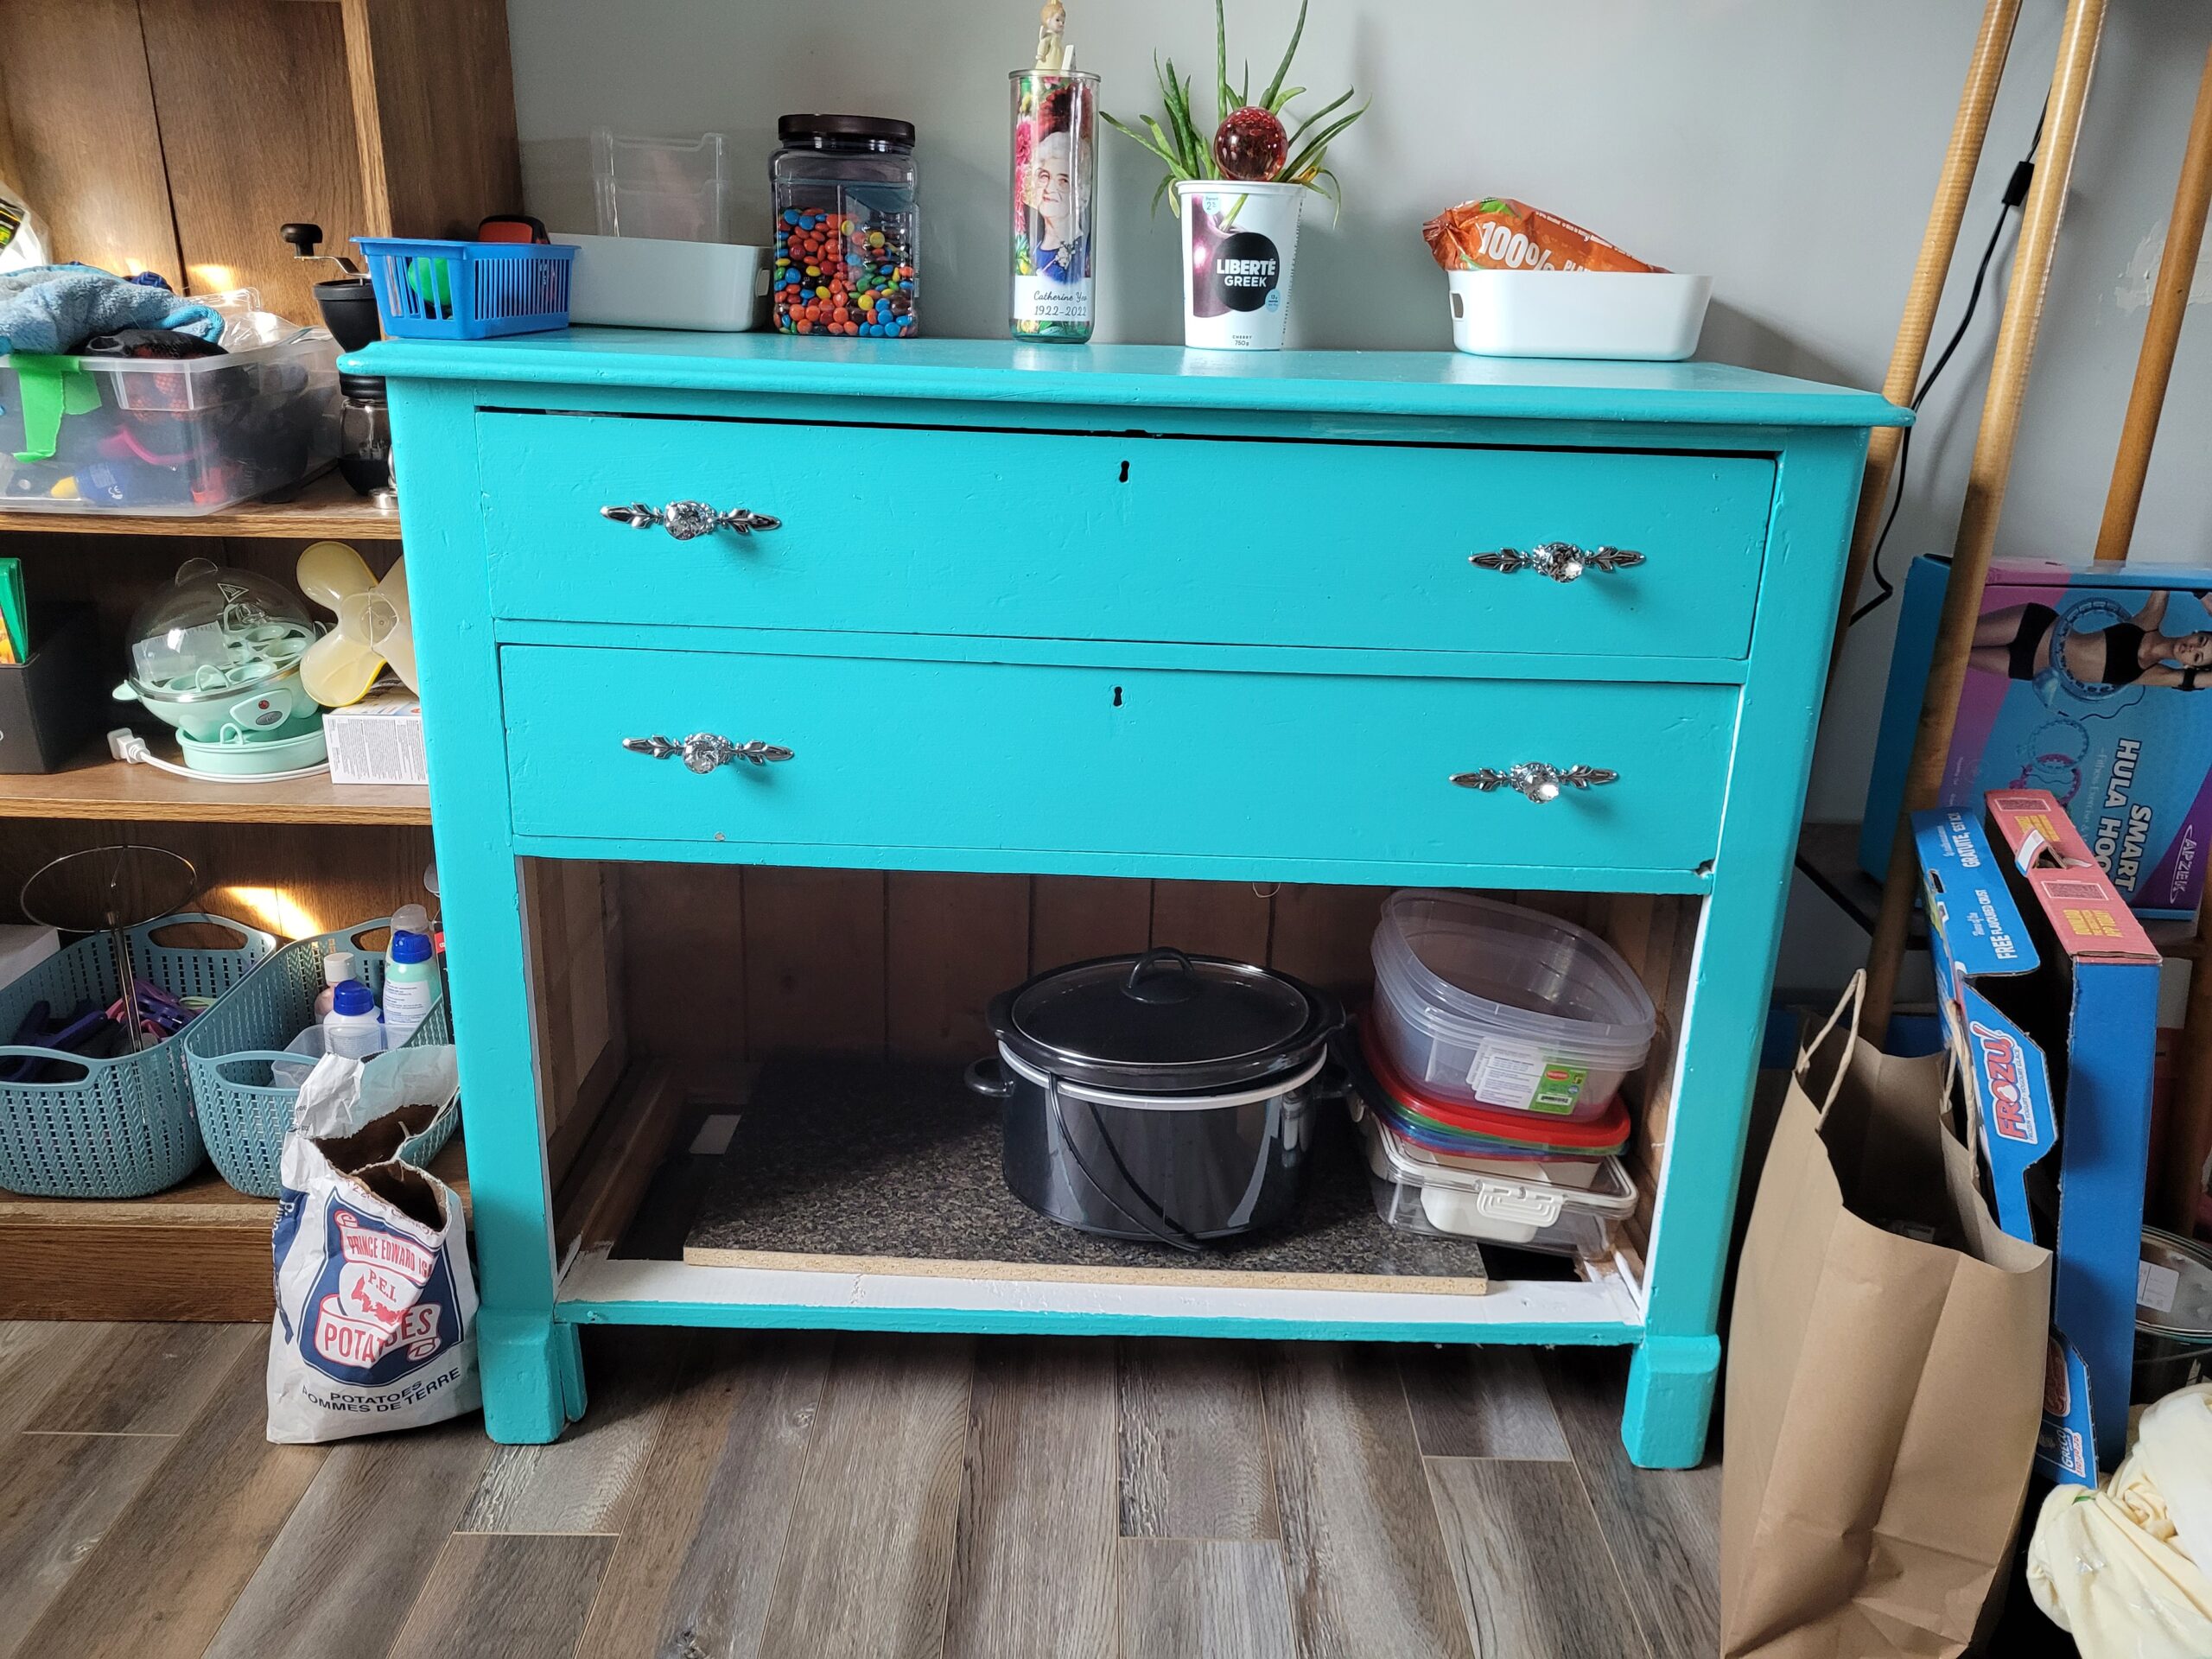
This dresser was in my mother's house, which was originally her grandmother's home. So the piece is over 200 years old, and still has my mother's great aunt and great uncles names on the drawers.
I wanted to have it as a coffee bar and some storage. I removed the bottom 2 drawers to give me storage for my crockpot and other dishes.
This had to be stripped, sanded, primed and painted and new handles put on, and I am in love with it.
6. Shannon Russell
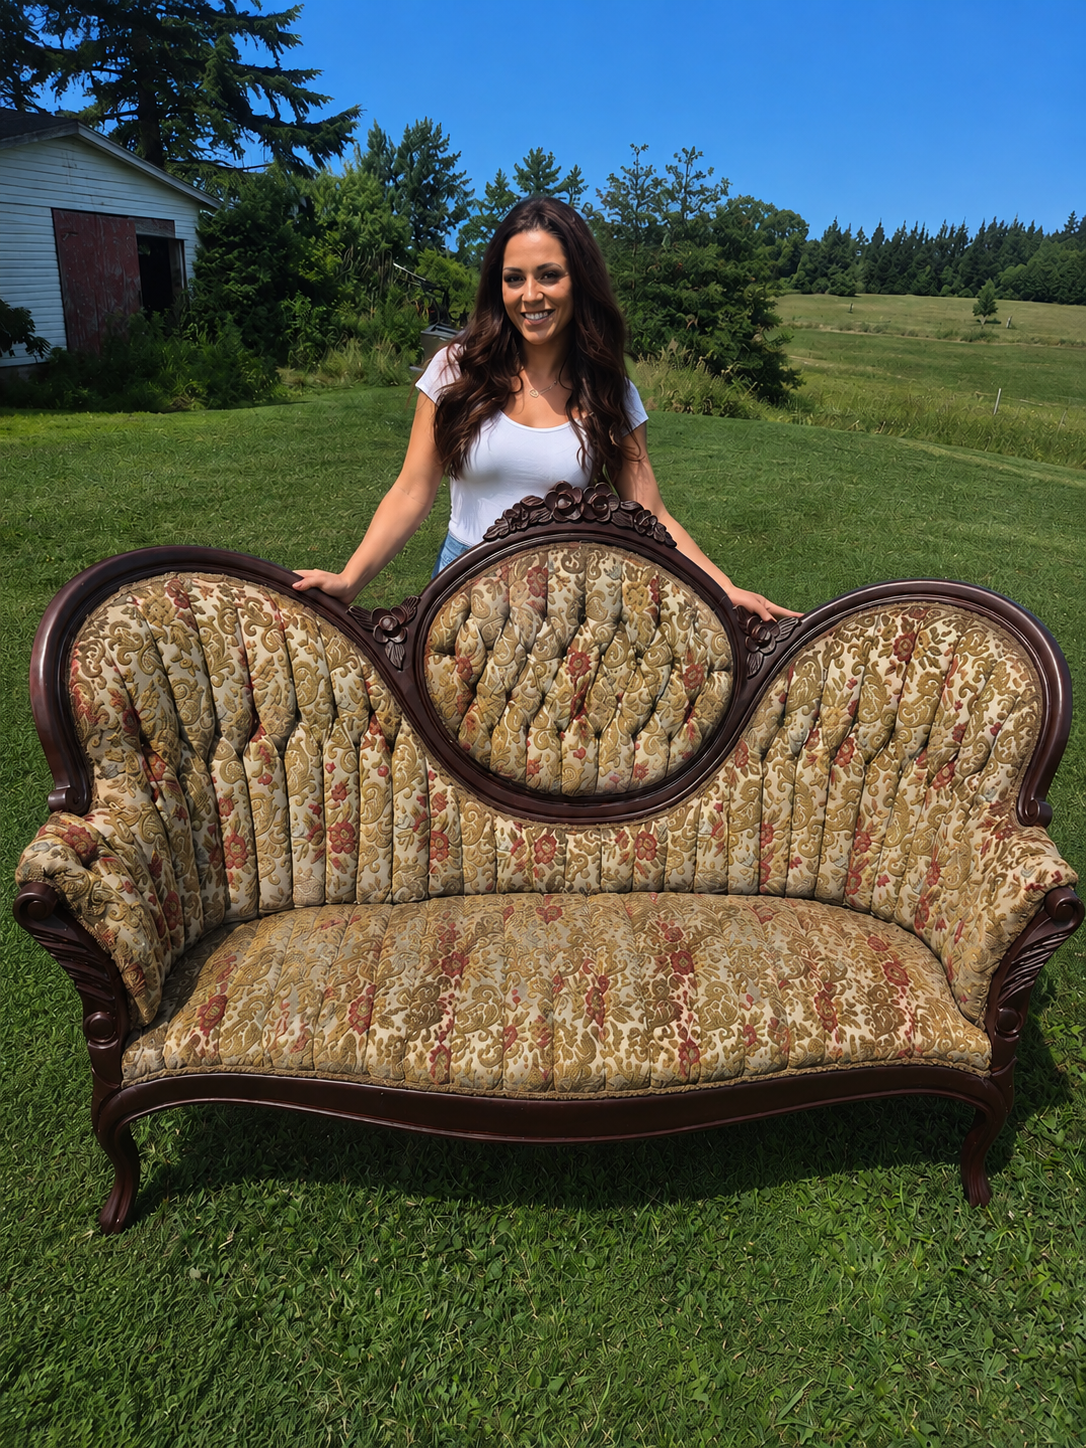
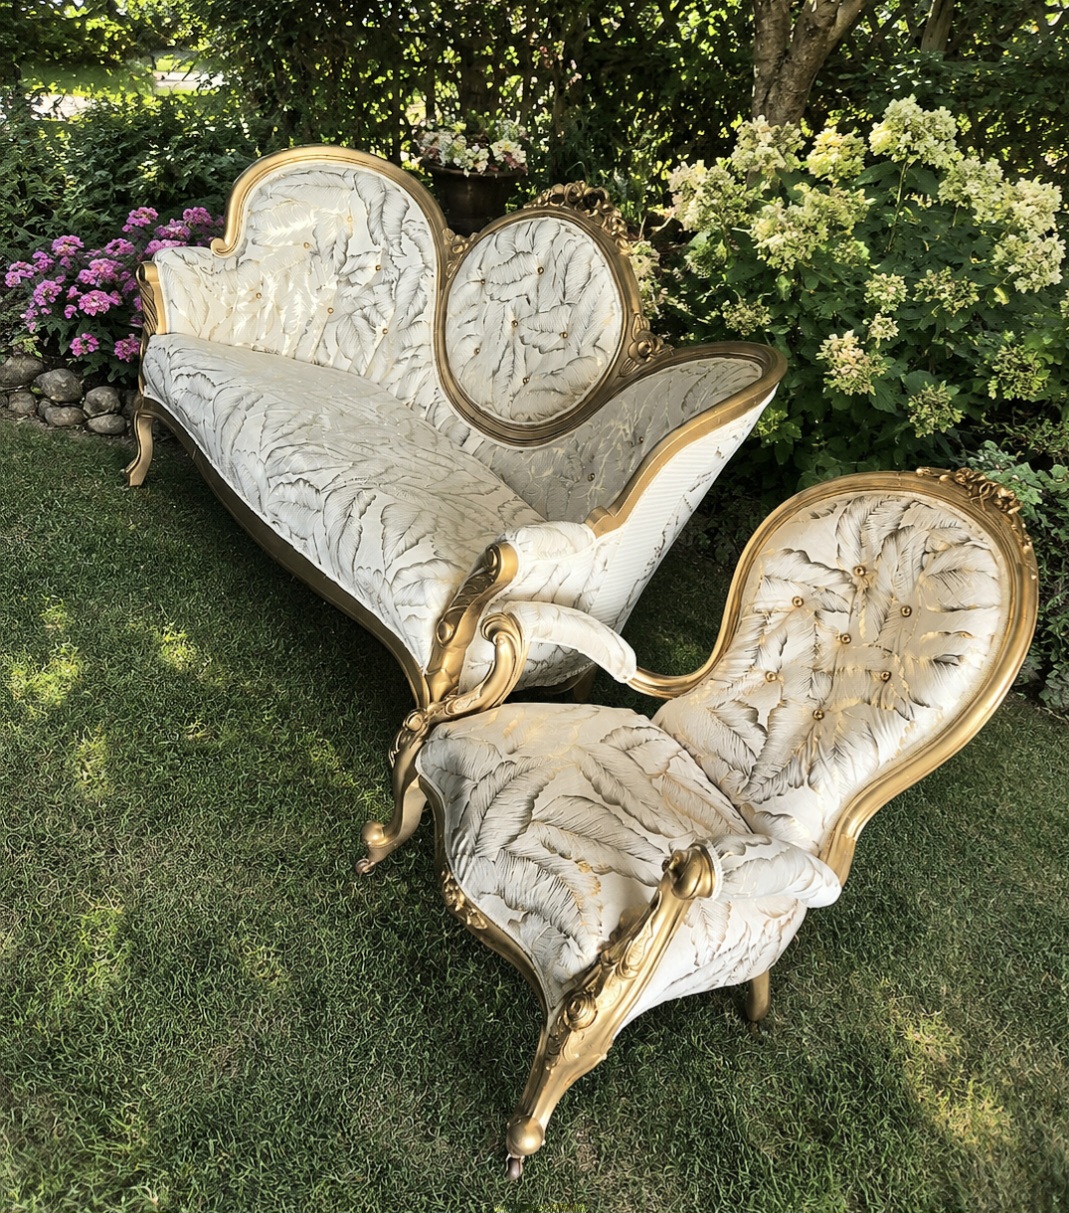
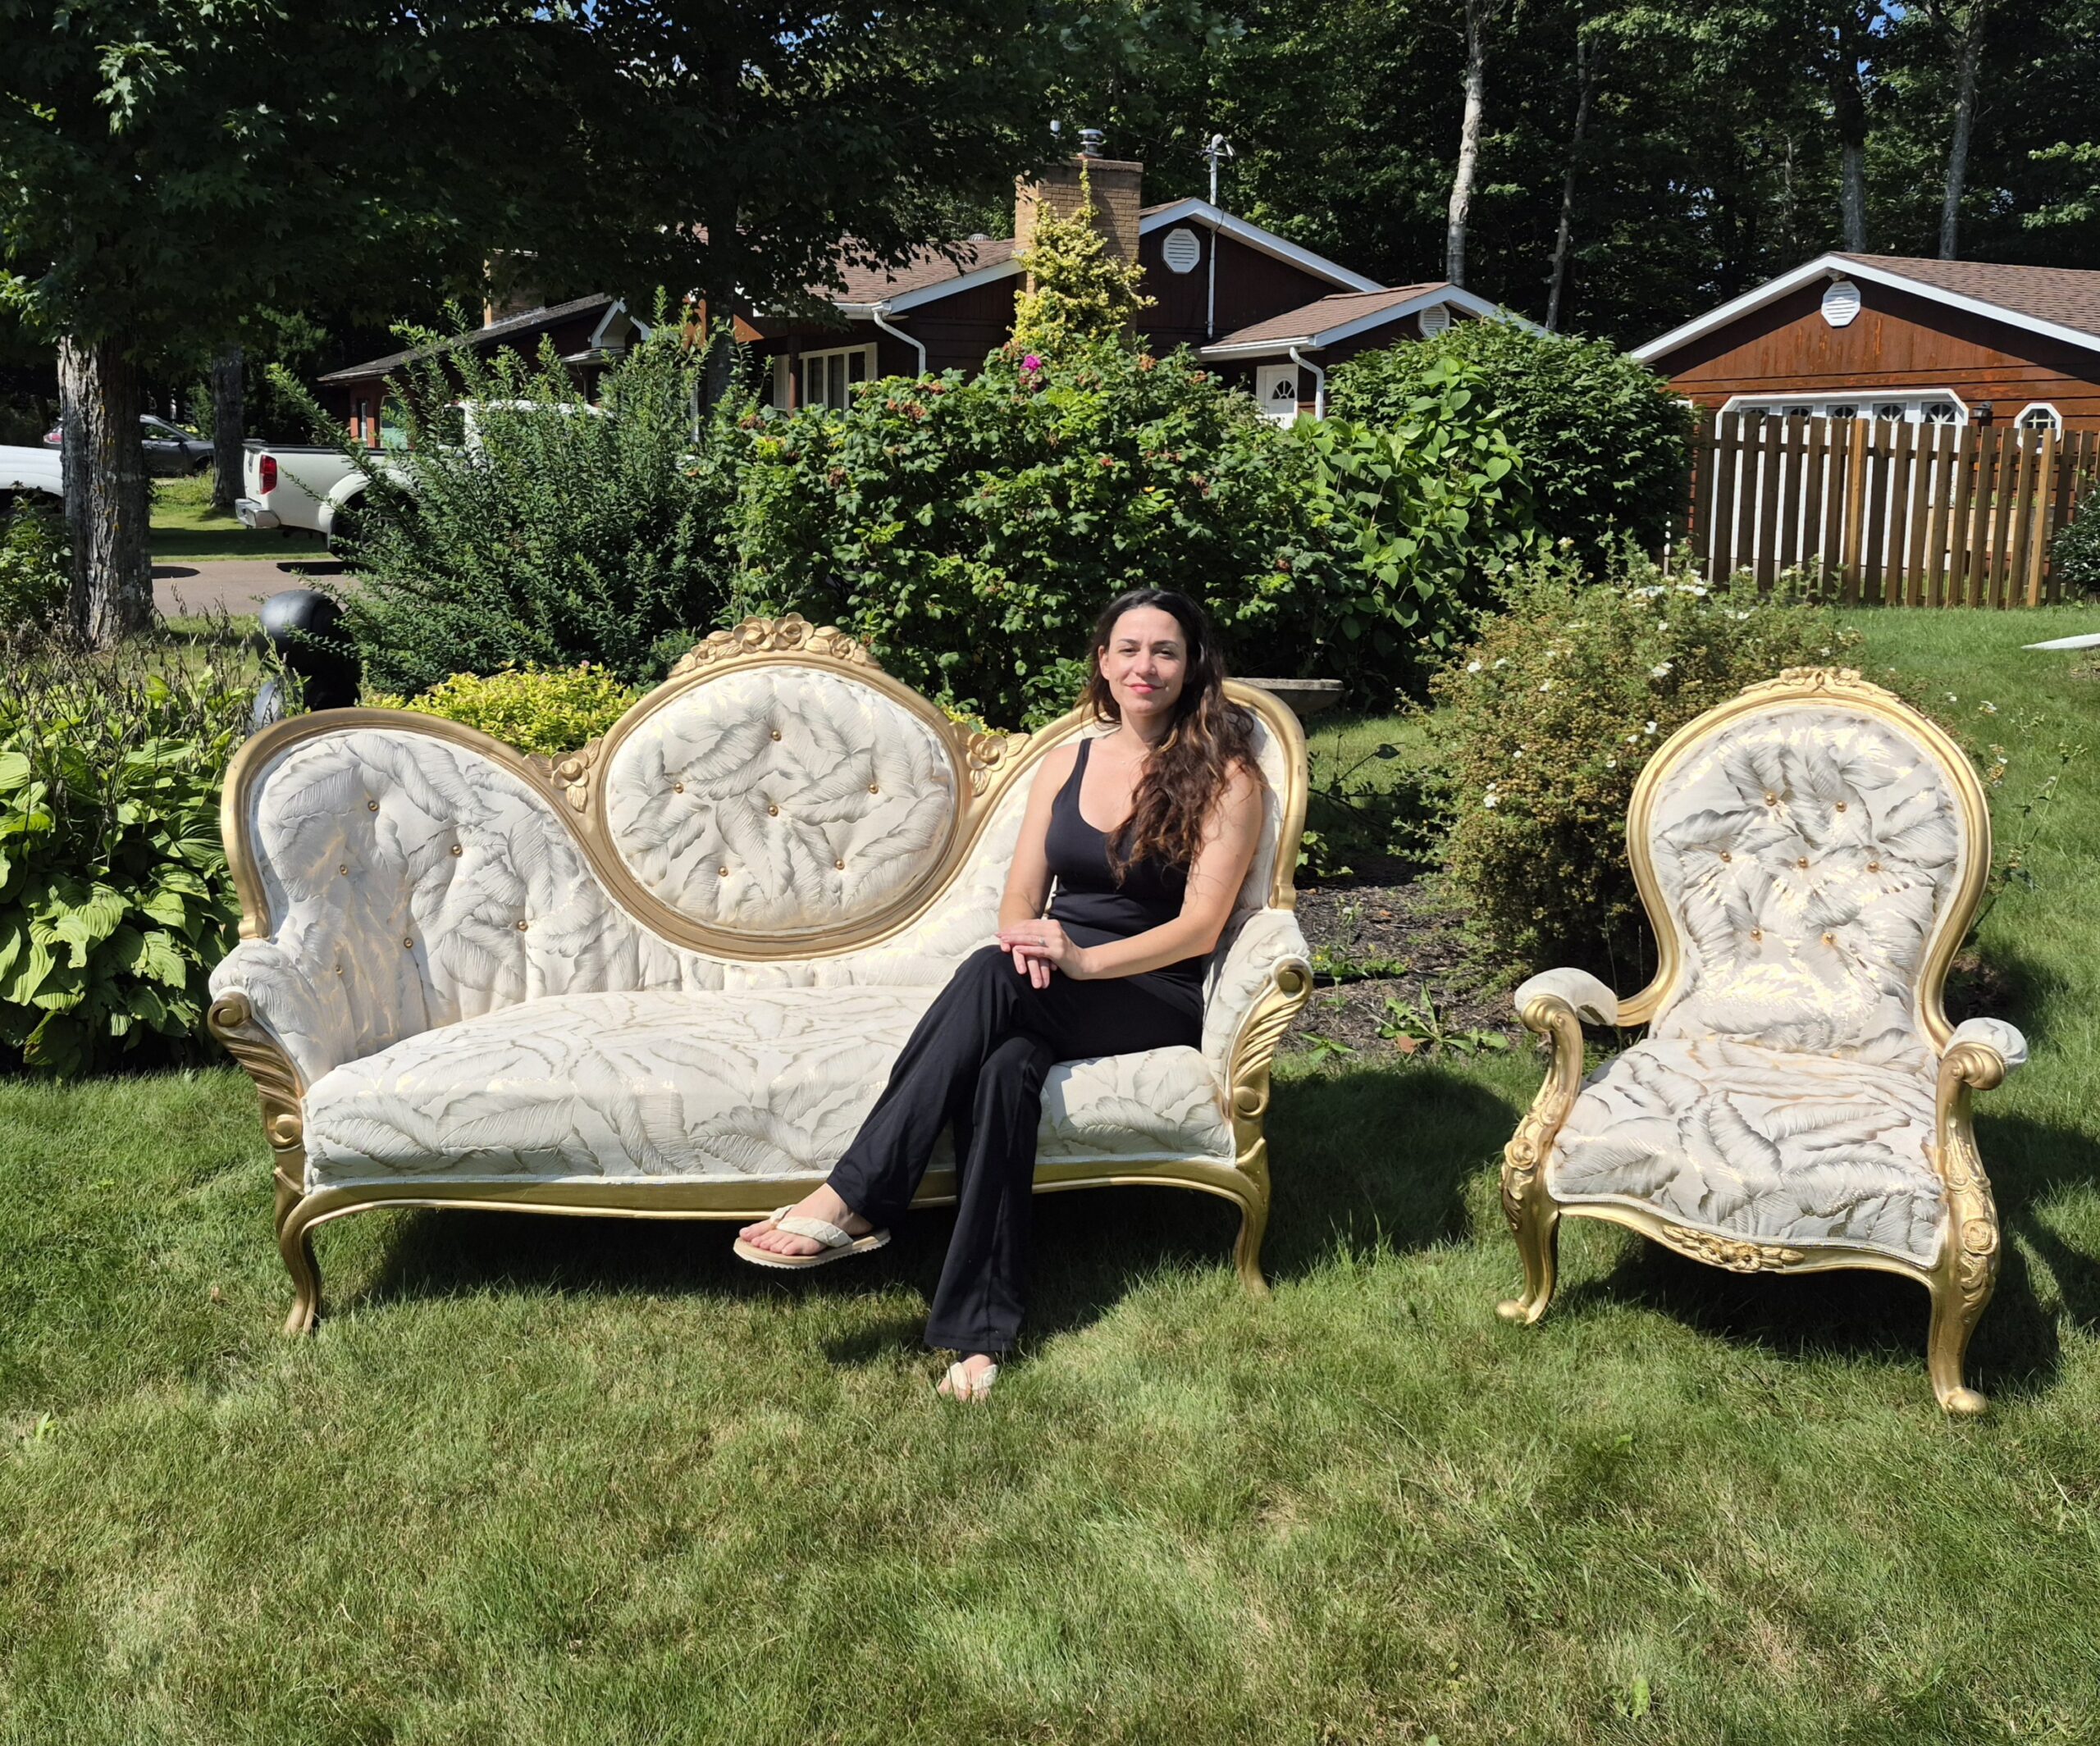
I wanted a glam gold statement set and I knew these mismatched vintage finds had the potential to become something truly special.
This Victorian set is now a beautiful blend of historic charm and modern luxury. From its ornate carved frame to the elegant gold button tufting, every detail was reimagined by hand while preserving the character that made me fall in love with it in the first place.
Not bad for a first upholstery project! What started as "I'll give it a try" may have turned into a new obsession.
View The Entries Below from 2025
2025 WINNER Corinne Cormier (People’s Choice)


2025 WINNER Loretta Arsenault (Judge’s Choice)


1. Ann McInnis


The dresser was bought at ReStore Charlottetown in August 2024 and flipped shortly after for a dresser/change table for our grandson, who was born September 2024.
2. Chivonne Roche


I found a double bed headboard that was painted blue. I sanded it down, and whitewashed the wood and sealed it. Then I added cabinet doors to the headboard to conceal anything inside it. Then I added wallpaper to the cabinet doors. It's a beautiful piece brought back to life.
3. Courtney MacCormac


This coffee table is more than just a piece of furniture—it’s a keeper of memories. It once sat quietly in my grandparents’ living room, a steady presence through holidays, family gatherings, and quiet Sunday afternoons. As kids, my cousins and I would circle around it, flipping through old photo albums, laughing at crooked haircuts and silly faces, sharing stories, and learning our family history one photo at a time.
When it came time to sort through my grandparents’ belongings, letting go of that table just wasn’t an option. It had to come home with me. Not because it was valuable in the traditional sense, but because it meant something. It was a symbol of family, of laughter, of love shared in the simplest of moments.
As I brought new life into the table by painting it—it’s not just being restored, it’s being reimagined. I wasn’t erasing the past; I was building on it. And someday, maybe others will gather around it again, making new memories.
4. Cynthia Hooper

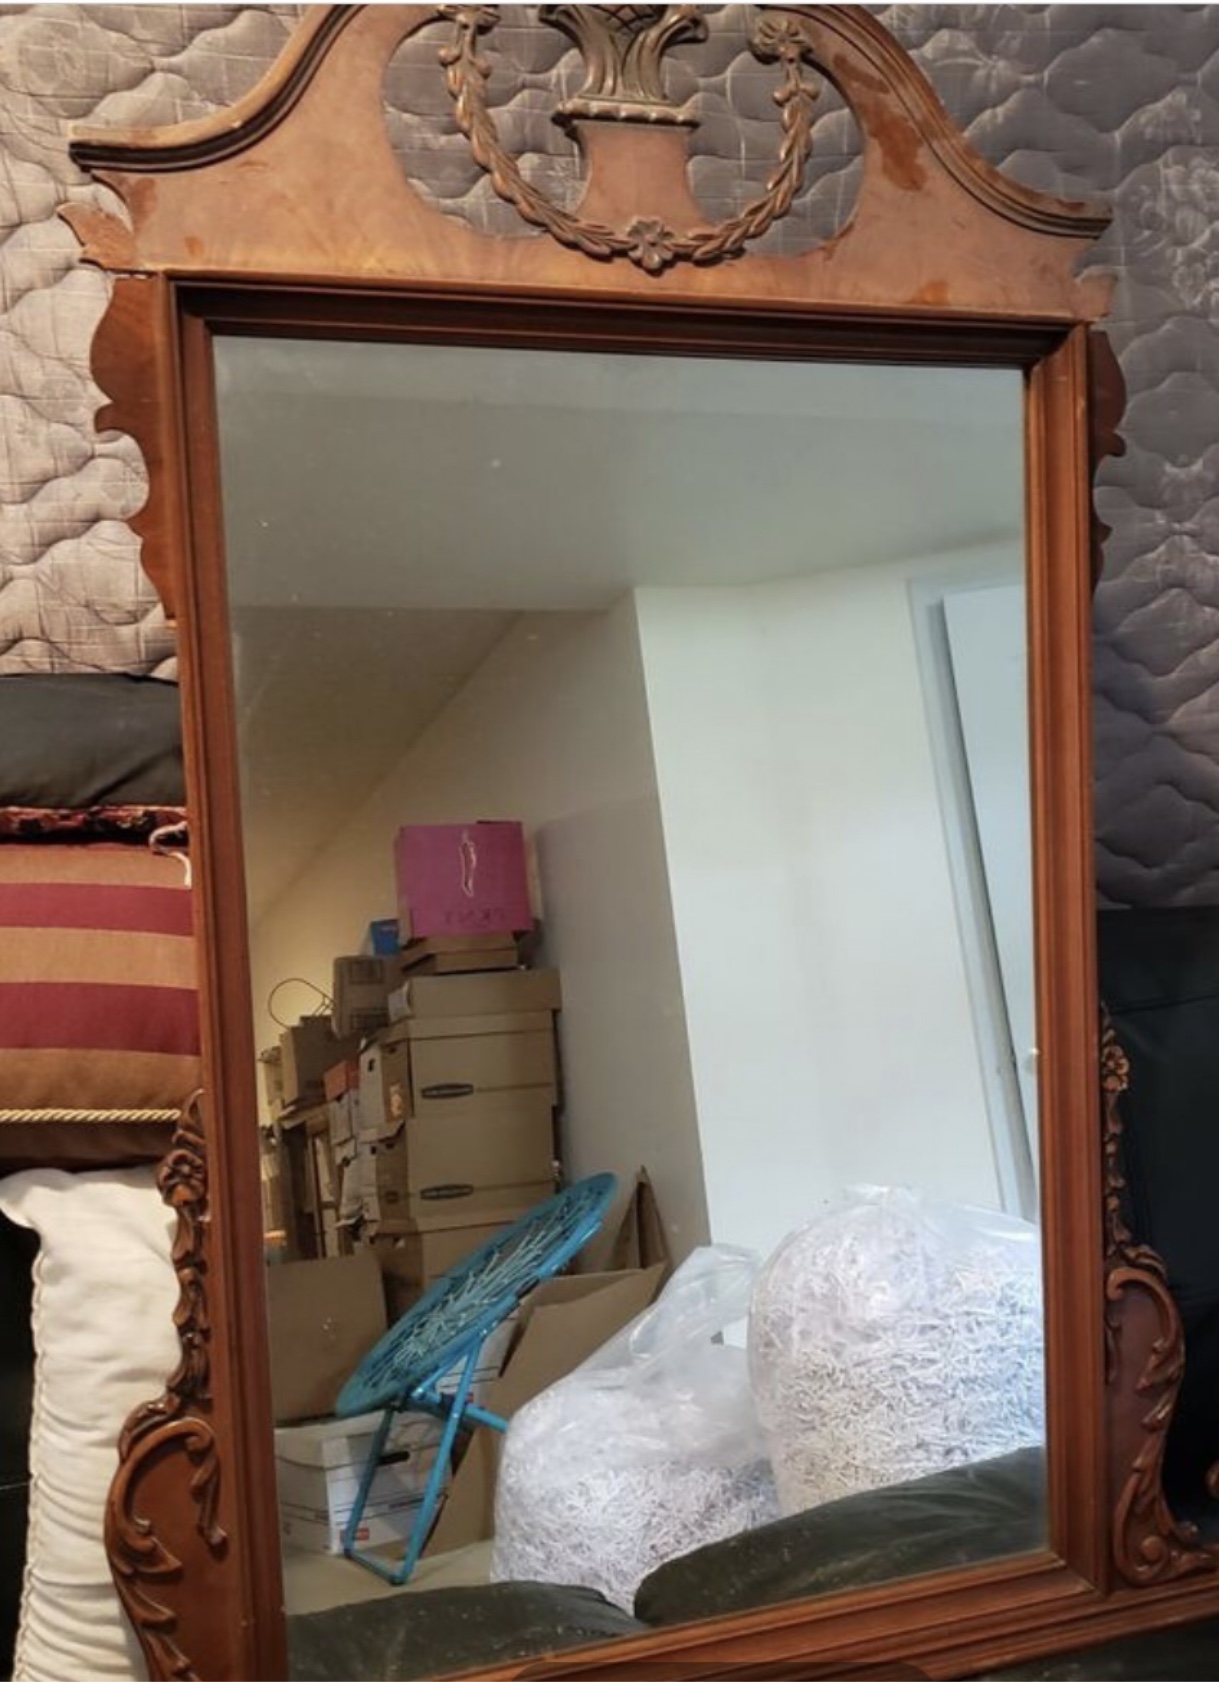
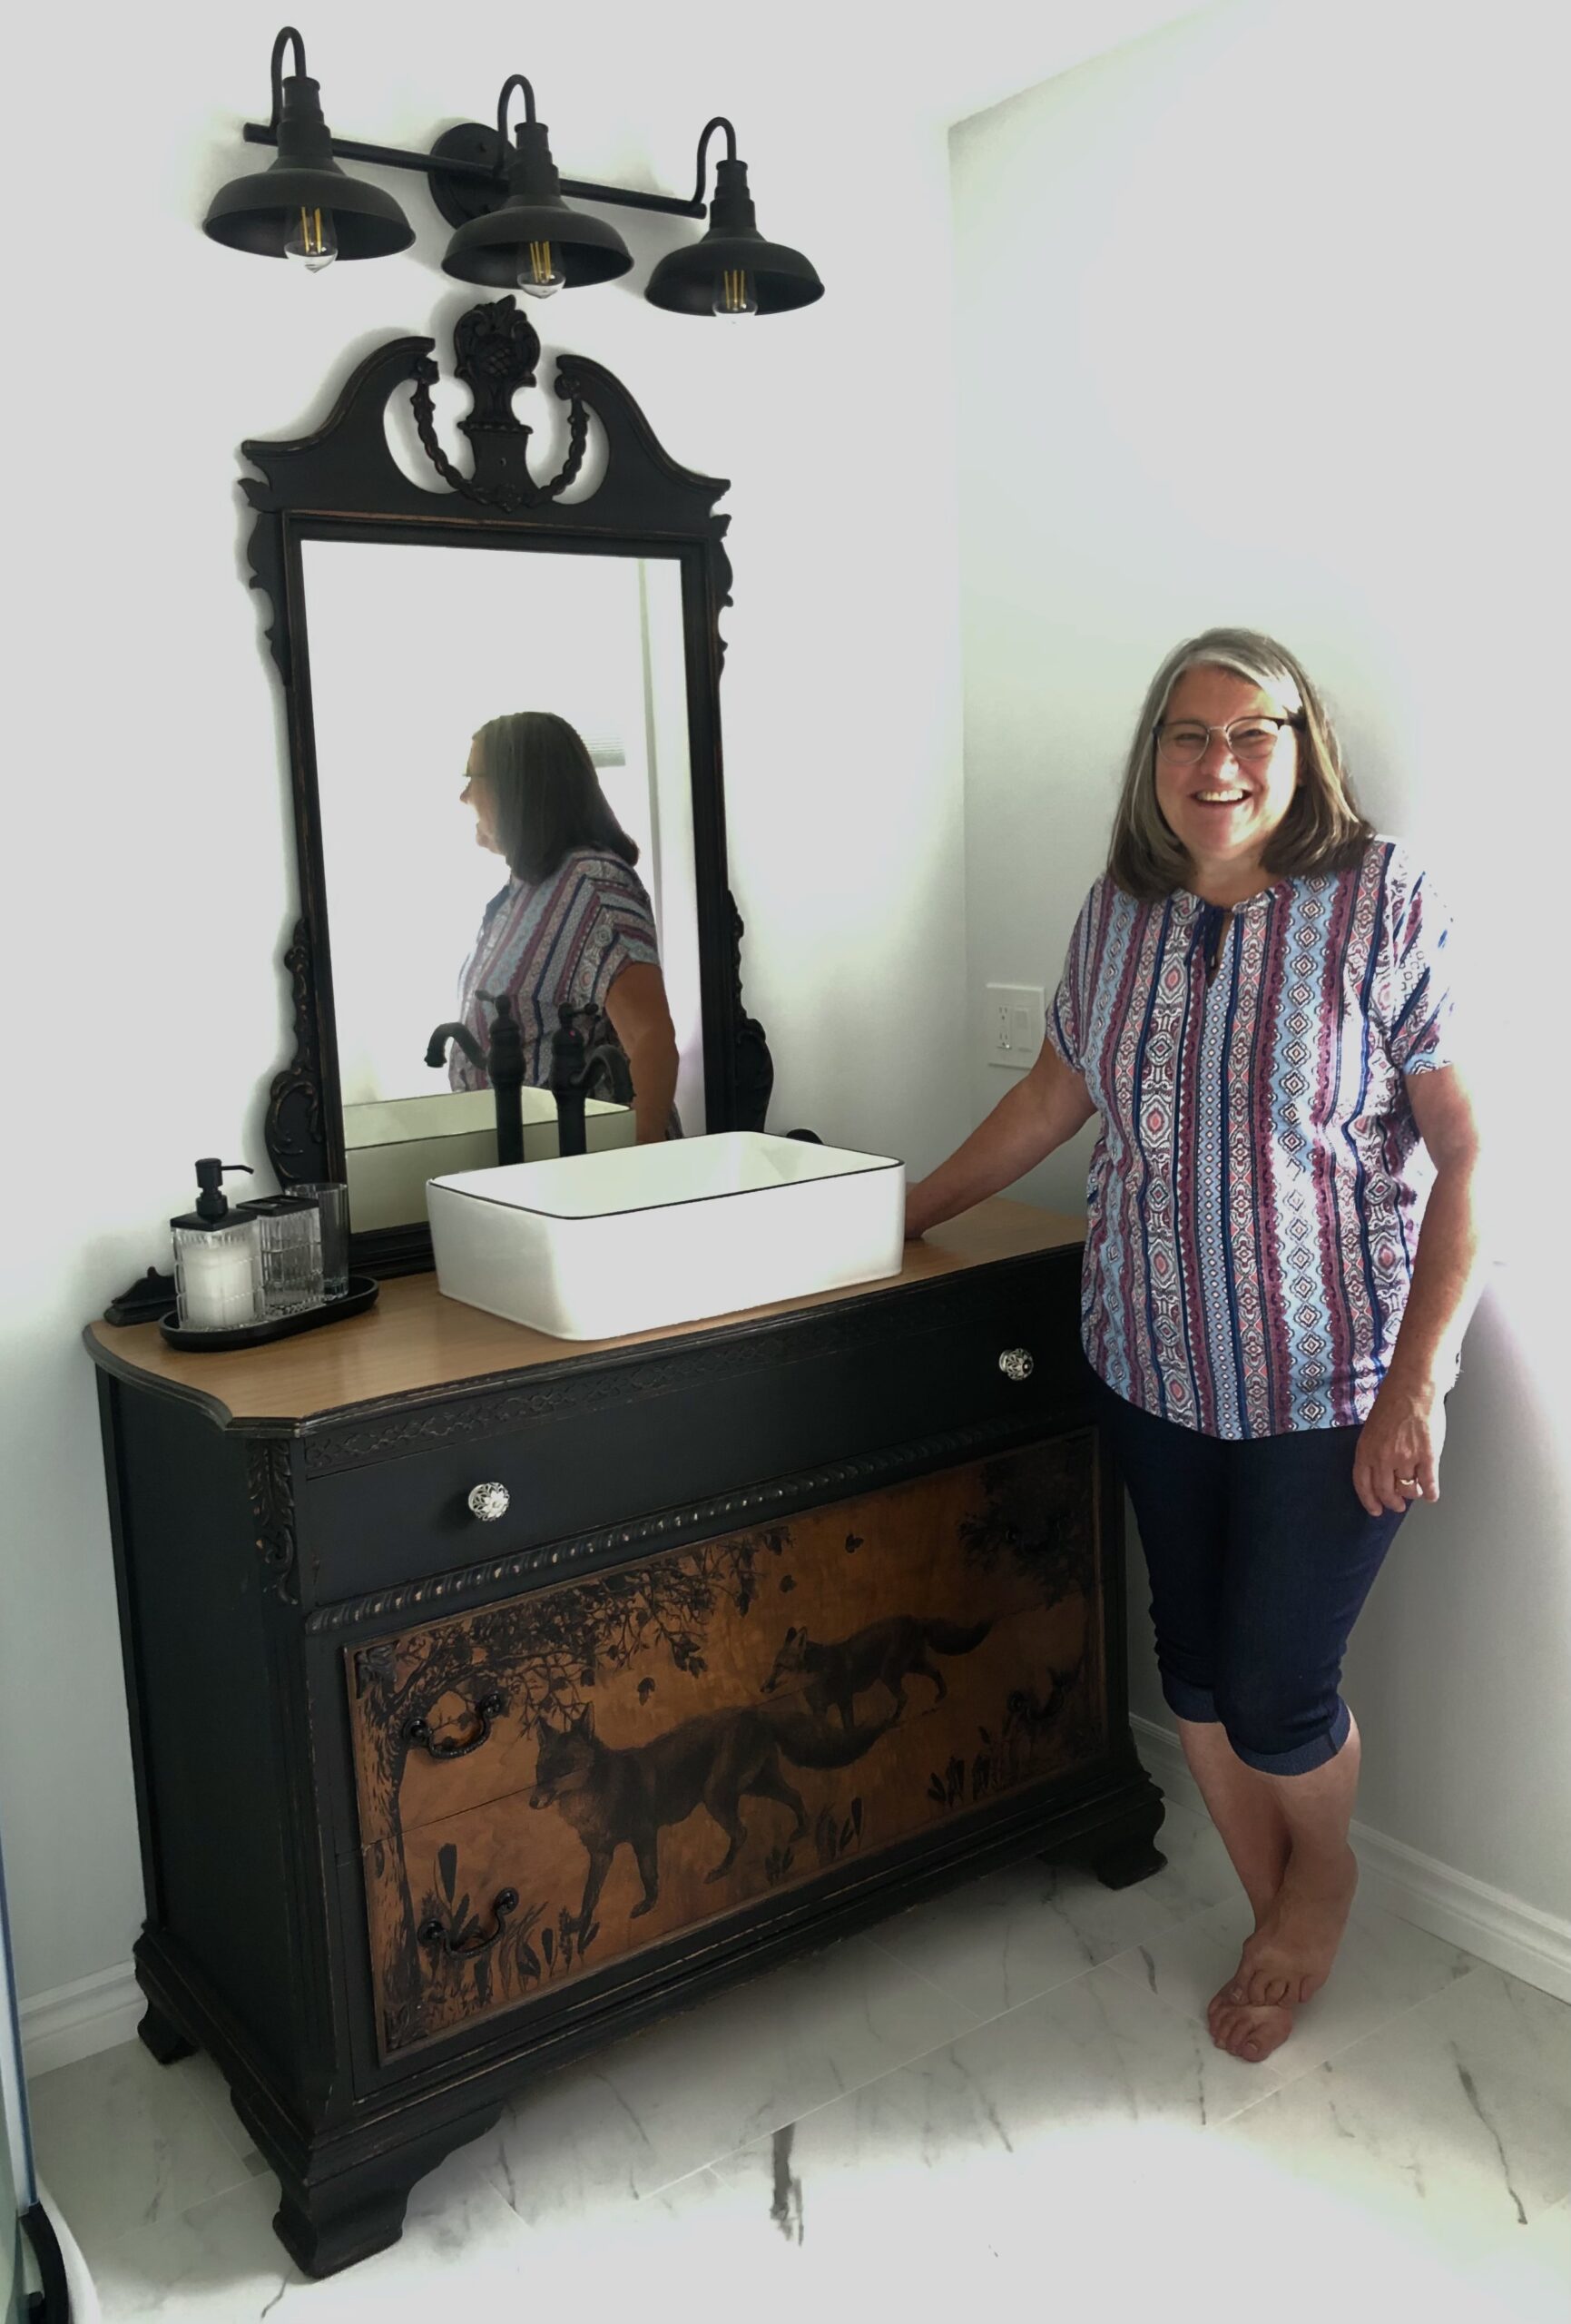
I needed a vanity for our new bathroom reno. They were far too expensive, so I made my own.
I purchased the dresser and mirror separately. Cut out holes in drawers and made boxes to go around plumbing. Cut out holes for taps and and sink in top of dresser. Sanded the top of dresser, then sealed it with vanish and sanded the drawer fronts and sealed with hemp oil. Waxed the edge of dresser and mirror. Painted with black mineral paint and sanded areas with wax. Next came the fox transfer.
Tah-dah! Hope you like it.
5. Denise Gray


I bought the chairs on marketplace about a year ago to redo for my new house. When I took off the dirty seats, some of them still had the original rush seats on them, so I decided to redo myself (lots of YouTube videos). I stripped them with orange stripper and oven cleaner. I put varathane on them and slowly redid the seats with paper rush I got from Amazon. Can’t wait to see them in my new home!
6. Heather Harris


This antique trunk is likely over 100 years old and was in need of restoration. It was badly rusted, dirty, and the inside paper lining was peeling.
I cleaned up the exterior, including using a Dremel tool to clean off excess rust on the metal, then painted the trunk, trying to match the original colours as closely as I could, staining the wood slats, then protecting it with a coat of lacquer.
The interior was also cleaned up, including stripping the peeling paper lining, stabilizing the lithograph image on the cover, and oiling the wood.
7. Holly Doucette


This piece was my brother's old dresser, headed for landfill. I was building a tiny house and decided to make it part of my kitchen cabinets.
8. Justin Lank
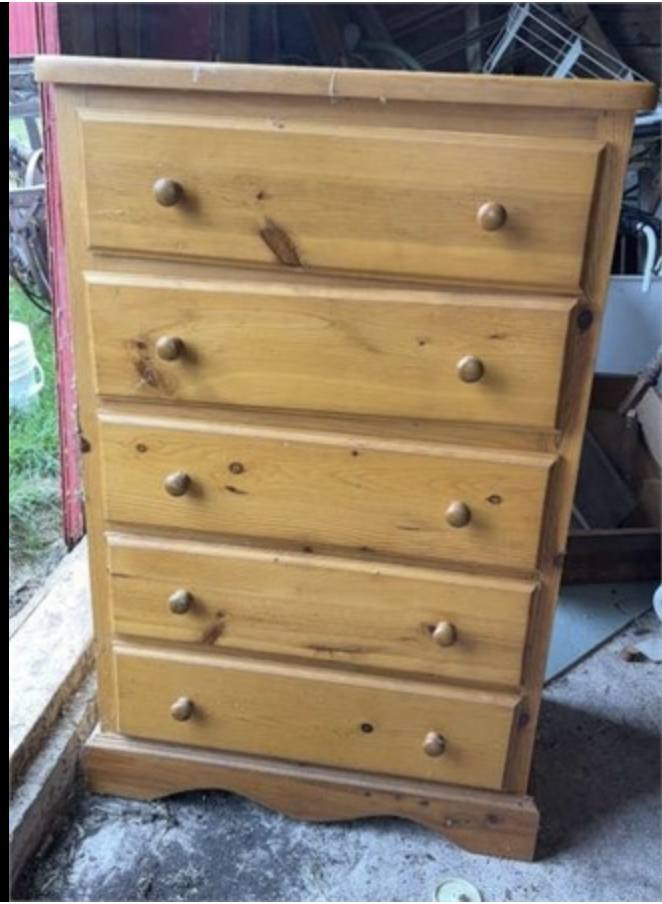


xThe dresser was purchased through Silver Fox Auctions and was in rough shape. We decided to use it as a base to make a built-in closet in our daughter’s room.
Steps:
1) A 2X4 base was made to ensure the built-in was level.
2) ¾-inch plywood was use to frame around the dresser and closet.
3) 1x2 were used to finish the plywood edges.
4) The exposed section of the dresser and drawers were sanded down and any major imperfections were filled with wood filler.
5) The entire dresser and built-in were coated with 2 coats of primer.
6) Two coats of top coat paint were applied.
7) The knobs of the dresser were replaced with gold knobs.
8) A bottom baseboard piece was added to the bottom of the unit.
9) Shelf hangers and rods were added.
9. Kellie Mulligan
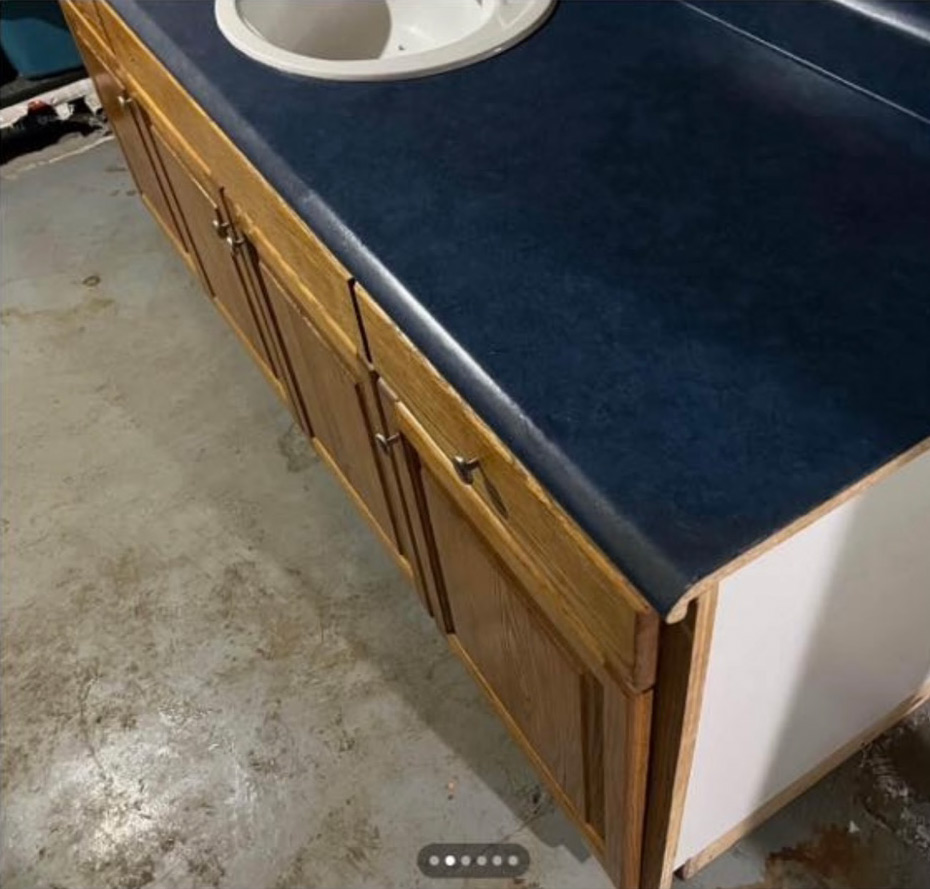
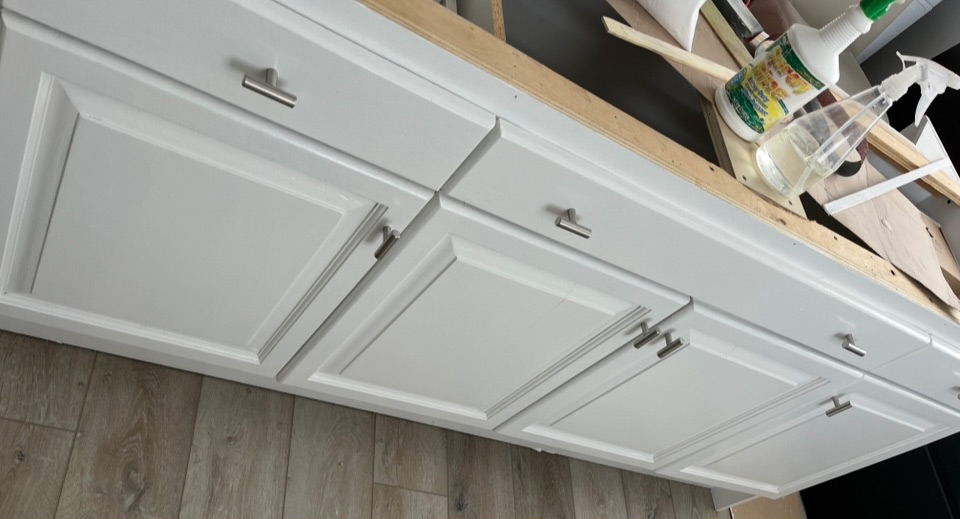

I found this bathroom vanity on FB Marketplace. We lugged it up out of the basement of a home in Summerside. We were renovating my husband’s Great Grandfather’s house and needed a kitchen island. I found the bar top also on FB Marketplace in North River. We painted the vanity, changed the vanity top, put in new hardware, and mounted it on a base to make it kitchen counter height. Very economical way to create a signature upscale kitchen island from an outdated bathroom vanity!
10. Linda Macfarlane


My table was in need of some love. Because the wood is not in great shape, I opted to paint. I would describe it as a hall table in a beautiful oval shape. Not too big, not too small. Measures 25" wide, 42" long, and 29.5" high. The bottom shelf adds a great deal more storage or display area.